Finding a leakage in the bathroom can be mentioned as a whole of terror. The most maddening thing that occurs in the bathroom is water leaking. Sooner or later, the leakage makes the homeowners get stressful and cranky in facing such problem.
The bathroom leakage repair is one of hardest jobs that you should do. You have to meticulously make sure which parts are leaking. For detecting the leakage, certainly, it needs an accuracy to determine the right place. Even, you should prepare some tools that seems neccesary in doing the project.

The leakage in bathroom can be caused by plumbing, sink, bathtub and others. Well, you absolutely must check the bathroom stuff one by one. By checking them, you will come to the point where the leakage happens.
Of course, to repair the bathroom leakage, you can try to do that by yourself before hiring a professional. Trying it by yourself becomes something interesting for you in which you can explore the problems personality. As the result, you could repair the bathroom leakage on your own if someday, it happens again.
Well, if you are finding the leakage in your bathroom, it is now your turn to repair it by yourself. By learning our guides below, perhaps, you can work the project well. Good luck!!!
DIY: Bathroom Leakage Repair
Water Leaking at Bottom of Toilet
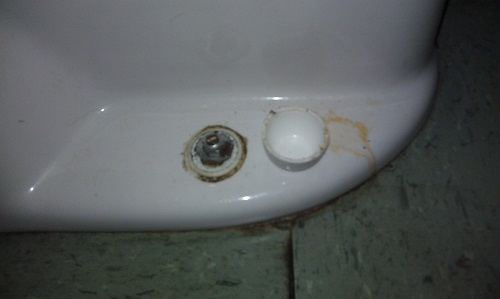
The first cause, the leakage may happen in this place. The base of the toilet is a prone place to leak. Commonly, these leaks come from a wax ring that does not longer work properly. Here is the easiest solution that you can do if you find the leakage under the toilet.
The Tools You’ll Need:
- New wax ring
- Bathroom Cleaner
- Screwdrivers
- Brush or Cloth
The Steps:
Step 1 – The first step, prepare the tools. Then, you must remove the toilet tube by releasing the buttons and bolts using the screwdriver.
Step 2 – You can release the bolts at the bottom of toilet tube to remove all parts of the toilet.
Step 3 – If you have released those parts, then you can find the wax ring. It connects the toilet to the plumbing.
Step 4 – Repeal the old wax ring using the screwdriver. Clean the area using a bathroom cleaner or vinegar to soak away the rust or mold.
Step 5 – Install the new wax ring into the hole or you can install it doubly without removing the old one.
Step 6 – Finally, reinstall the toilet back to the right place with the correct assembly.
Repairing the Bathroom Sink Drain Leaks
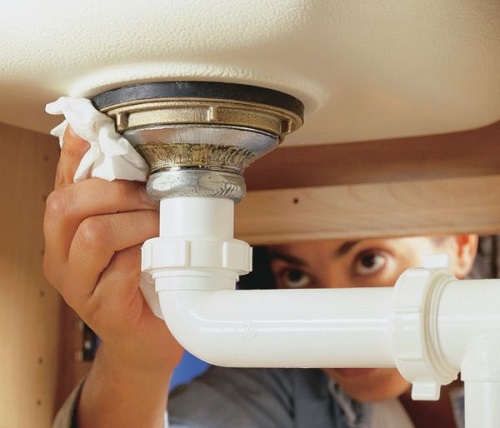
Bathroom leakage repair maybe also occur in the sink drain. The bathroom sink drain leaks can be called as the major problem that you have to handle. The drain is channeling the water from the sink into the water disposal. Repairing the leaky drain is absolutely an easy way which won’t spend the time a lot.
The Tools You’ll Need:
- Wrench
- Rubber Washers
- Plumbers Putty
- Flashlight
The Steps:
Step 1 – The first step, you can turn off the sink by shutting off the valves. Then, open the water line by switching the hot and cold water on. It will allow the water to drain out in the pipes.
Step 2 – Then, you have to check the joints under the cabinet. You can find the leak with a flashlight by crawling under the cabinet. By doing this, you can totally find the pipes which are connected with each other.
Step 3 – If you do not solve the leaks in the pipes yet, you can check the rubber washers. It is used to secure the pipes. The washers are getting crack and brittle. Then, replace the rubber washers and reconnect the pipes into the joints.
Step 4 – In this step, replacing the pipes under the bathroom sink can be a solution. Then, if you can’t solve the leaks yet, remove the pipe by a new one and test the drain again.
Step 5 – Finally, you can find the source of leakage by doing those steps. Generally, the sink drain leaks come from the parts that we have explained above. The last solution, if you still find the sink drain leak, you must certainly ask a professional around your area.
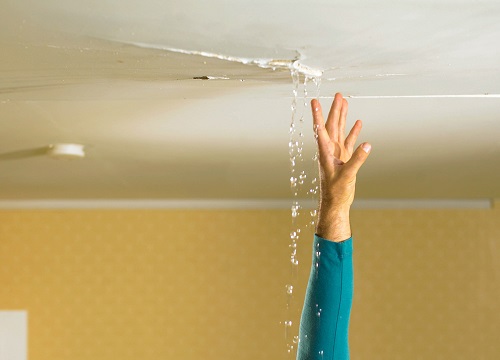
Repairing the Hidden Plumbing Leaks
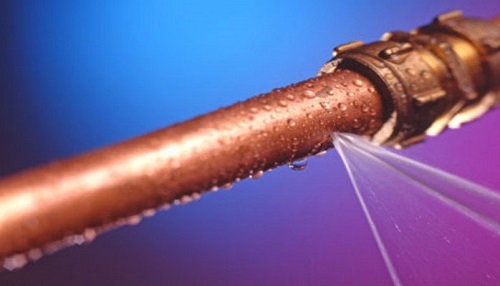
The hidden plumbing leaks are most common bathroom leak type that happens in your bathroom. There are some signs that you can find when it occurs in your bathroom. The signs of problems include peeling paint, loose tiles, molding spots on the wall, and water stains on the ceiling. To find the sources, checking for any slits where the tub and the shower meet the flooring or by splashing the water all around the frame and door if you detect the leak from a shower door.
The Steps:
Step 1 – Firstly, detect the area where the water is leaking
Step 2 – If you already found the sources, you can start to repair it. Make sure that you find the correct place. As we described earlier above, the sources can come from anywhere. So, you have to repair it based on the sources.
Step 3 – If your bathroom door has rubber gaskets, replace the worn gaskets with a new one by looking for a matching replacement.
Step 4 – If the leaks occur on the tile caused by the hidden plumbing. The steps that you must do is to remove the loose tile. Cut off the plumbing based on the leak size. Then, apply the new one with the same size to connect the plumbing back. Glue it using the pipe glue to strengthen the grip. If the tile is still solid, reattach the tile back using the concrete.
As a result, repair the hidden plumbing leaks based on the sources and make sure that you work in a right place from where the leaks come from.
Well, those are some leakages that might happen in your bathroom. Certainly, if you find the water leaking in your bathroom, don’t wait for the time. The bathroom leakage repair is an immediate action that you should do. You absolutely have to repair it immediately before you gain the undesirable things.