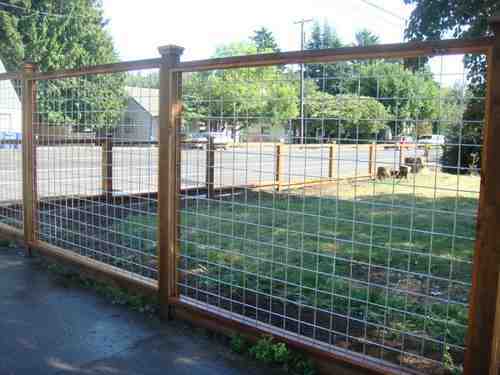
Many people determine that the cedar posts and barbed wire fences are commonly used for livestock or farmhouse. No wonder if many people prefer the concrete fence, vinyl fence or aluminum fence to get modern style than the barbed wire. For that reason, people desire in keeping their privacy from the neighbor eyesight. If they use the barbed wire, automatically, the people outside can see their activities inside the house. Well, the cedar posts and barbed wire fences is more suitable to use for animal breeding.
Over time, the fence is not only used for such purposes, but also as the fence for the house. Even with a wire fence, you can certainly keep the house very well because the barbed wire fences disable strangers to come into your home.
Furthermore, the barbed fences with cedar posts also do not need much cost for installing. The model of this fence is more natural appearance to build around your home. Because, you just need the wooden spindles and the wire as the main components.
For you who want to install the barbed wire fence with cedar posts for your house, you can follow the instruction below including the materials and the steps.
DIY: Installing Cedar Posts and Barbed Wire Fences
The tools you will need:
- Ratchet type in-line wire strainer
- Barbed wire
- Cedar posts
- Long brace pin
- Short brace pin
- Barbed Staples
- Hammer
- Marker
- Battery powered drill
- Tape measure
- In-line strainer handle
The Step
Before you begin, make sure that you are wearing safety glasses, sturdy shoes and gloves.
Step 1 – Install the end post and brace post, make sure the wood posts are probably driven to the correct depth providing the best holding strings. The minimum depth for the end corner and brace posts is three and a half or preferably four feet. If you auger the holes and tamp the soil back in around the post. All the soil that comes out of the hole must be tamped back in. This can be accomplished by tamping the dirt back in a little at a time.
Step 2 – You can add alternating layers of dry concrete mix and soil. When adding dry concrete, mix the bottom layer should be soil followed a layer of concrete mix. Continue to follow this pattern be sure to keep the final layer of concrete 10 to 12 inches below the top of the hole.
Step 3 – Avoid filling holes with solid concrete, set the post in cleaned out the whole. Line your guard wire and begin tamping soil into the hole a little at a time.
Step 4 – Mark the spots for the brace pins that will hold the top of the rail in place. To determine the correct position for the brace pins, measure from the bottom of the woven wire to the point halfway between the second and third wire from the top.
Step 5 – Most wires should be installed two to four inches off the ground, add this distance to the previous measurement and marks this height on both the end post and brace post. You can see the example the measurement from the bottom of the woven wire is 31 inches plus 3 inches off the ground. Put the brace pin at 34 inches.
Step 6 – Using a 38 inches, ship auger drill bit drill 3 inches into the end post and all the way through the brace post.
Step 7 – Insert the log brace pin into the hole and tap in until it is flush with the other side of the hole. Drill 2 inches into the one end of the top rail and insert the brace pin into the top rail.
Step 8 – Place the brace pin into the previously drilled hole and lift the top rail into the place. The top rail should be parallel to the ground. Take a moment to check this.
Step 9 – When the top rail is in the correct position, drive the brace pin in using a small two pound sledge hammer. Leave one to two inches of the brace pin sticking out of the brace post. This will be used to wrap the twitch wire over later.
Step 10 – Drive a staple flat into the bottom of the in post and drop a staple in behind. it will allow wire to run smoothly around the post during tensioning.
Step 11 – Install the in-line strainer to the end of the twitch wire, place a C-23 long crimp sleeve on the wire followed by the end of the in-line strainer.
Step 12 – Bend the wire back and insert it into the other hole on the crimp sleeve. Putting a slight bend in the end of the wire will help it line up with the hole in the sleeve.
Step 13 – Using a crimping tool, squeeze the sleeve three or four times. Using the in-line strainer as a handle, put two wraps of wire around the brace. The twitch wire always goes to the bottom of the end or corner post. Under the staple and over the top of the brace pin. the twitch wire always goes to the bottom of the end post or corner post.
Step 14 – You can adjust the position of the in-line strainer prior to tensioning by the grabbing the two wires and sliding them back and forth. The in-line strainer should be on opposite side of the woven wire fabric. This keeps the wire from catching in the strainer during the wire tensioning process.
Step 15 – Making sure the wires are not cross where they go under the staple and over the brace pin. Check a couple of times during the tensioning process as the wires may move.
Step 16 – Using the strainer handle slowly, tension the high tensile brace wire until snug. Pull outward on the in-line strainer to assist in getting the twitch wire uniformly tensioned.
Finally, the cedar post and barbed fence is done and you can keep your home securely.