There are tons of ways that homeowners can do to make each side of their houses look good by buying new stuff or remodeling it. The method also varies based on how kind of overall finish that they want to get, for example, some homeowners prefer to hire professionals so the result will be flawless even if they have to spend more budget on it. On the contrary, some others love to explore and experience fun and tempting DIY methods that can be found easily on the internet.
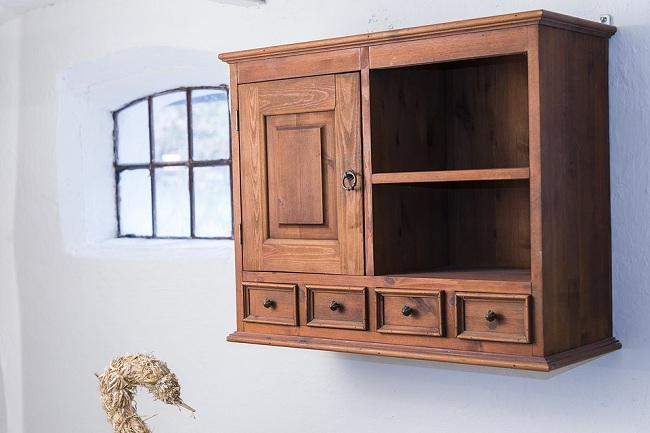
One of the home improvement projects that you can do by yourself is antiquing wood-made stuff, including kitchen cabinets. Just its name suggests antiquing means that you make a bright wood surface look antique, worn, aged, and give that vintage vibe. You can do this process for both old cabinets and new ones if you’re bored with the current ones. Of course, there are dozens of tutorials out there to help with the whole process.
(You may also love this: How to Take Care of Your Yard: 14 Useful Lawn Mowing Tips)
HOW TO ANTIQUE KITCHEN CABINETS
In general, you will need some supplies and tools to do this DIY process. Those are:
- Brushes
- Rubber gloves
- Medium or fine sandpaper
- Sanding block or electrical sander (optional)
- Clean and soft cloths/rags
- Antique glaze
- Polyurethane
- Painters tape (optional)
- Base color/stain (optional)
Once the tools and supplies are ready, let’s get started with the process!
Detaching Cabinet Doors
You can opt-out of this option if you choose to let the door as it is. If you go with this choice, you will need to mark the rest of the cabinet parts using painter’s tape to make sure that they’re secured from stains or spills. However, if you want to detach the doors, you might want to check this simple guide on how to remove kitchen cabinets.
Staining Process
The next step is to stain the wood surface, however, please note that this step is optional. As explained above antiquing means that you create an ‘aged’ look on top of a brighter surface.
- So if your cabinets are quite dark, whether they’re stained or natural, you would need to make them brighter first so the glaze will be more visible.
- If you’re looking for a brighter stain, you could try using an oak wood stain for a more cottage look. For more detailed guides on how to stain kitchen cabinets, you may read them here.
Dirt Cleaning
If you’re you can move forward to the next step which is cleaning the surface. Just like the other staining or painting processes, any stain and paint won’t be able to stick well to a dirty and uneven surface so you have to make it clean first by using a clean damp cloth or rag.
- Slightly dampen a clean and soft rag or cloth.
- Clean the surface until all debris and dirt are removed.
- Let the surface dries perfectly before applying the antique glaze.
(You may also love this: 8 Steps on How to Drain a Pool Easily and Quickly All By Yourself)
Start Antiquing
Now it’s the main process is applying the antique glaze. For this step, you will need a small brush to reach the corner and add more details. The steps are:
- Before using the glaze, shake and stir the product first. You will have to follow the instruction based on each manufacturer’s packaging.
- The next step is to apply the glazed to each corner of the cabinets and let it dry.
- Once it dries, sand those corners with sandpaper or sanding block to create an ‘aged’ look.
- If the result is not satisfying enough, you might want to repeat this step one more time.
- Repeat these steps for the rest of the cabinet parts.
(You may also love these: How to Build a Picket Fence with Only 5 Steps | Fun DIY Project)
Seal the Result
Last but not least, seal your work using polyurethane, especially for kitchen cabinets that you place in a busy area and you use every day. The seal works to lock the stain and protect the painted surface from any splash or spills.
(You may also love this: How to Attach a Patio Roof to an Existing House with Only 5 Steps)
Nowadays, rustic vintage design becomes popular again and you can do it by yourself with some simple steps. Before hiring a professional, you might want to explore your creativity by following these simple guides in your own home. We hope that this helps you and happy redesigning!


