You don’t want the noise to disturb your sleep at night after a long day of hard work. The clanging pot falling in the kitchen, quarreling neighbor outside, noisy muffler from the traffic outside, all can be the sources of noise that you don’t want to hear in your bedroom. Then, if you have a secret conversation with someone that you don’t want to be heard by anyone else in your home. To handle this problem, all you need is a soundproof bedroom and the most important thing to build a decent soundproof bedroom, you have to build soundproof wall bedroom first.
Fixing the bedroom wall is critical because the onboard available walls are not effective in deadening noise. That wall works like membranes in the drums. Consist of two membranes that is attached to a structural framework filled with air, the wall will easily resonate when the noise is produced. The sound waves will strike on one surface and transmitted to another surface by the air inside the structural framework.
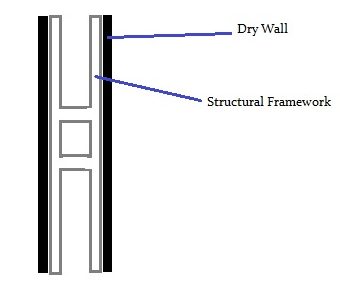
The density of the wall itself is very loose, as there is just hollow space. So, in order to dampen this noise, you have to restrain the transmission of the sound by fixing the structures of the wall. There are many ways to fix that, for a professional purpose, like a music studio, concert hall, theater, or science purpose, it is very costly. For the private purpose, like a bedroom, there will be a limited budget and hand to do that. Here you will find the cheapest DIY to build soundproof wall bedroom.
(Read also: Cheapest and Easiest DIY Soundproof Door)
Soundproof Wall Bedroom
First, you have to learn the main principle to the soundproof bedroom as stated in our earlier article. There are 5 main principles you have to remember to build soundproof wall bedroom:
- Mass: More dense wall = easier sound absorption, use the thickest drywall
- Absorption: softer material insulates the sound better.
- Conduction: Sounds is transmitted better through solid objects.
- Mechanical Decoupling/Isolation: Sandwiching insulator between two drywall
- Resonance: More dense wall = harder to resonate
DIY to Build Soundproof Wall Bedroom
Based on the 5 principles above, at least we know what we are going to do. Starting from increasing the mass of the wall, sandwiching it with proper insulation material, and compacting the installation that is already made. But, how to do it and what material is the best for insulation? Here, we will give you step-by-step directions to build a soundproof wall bedroom in an easiest and cheapest way.
Prepare Materials and Tools
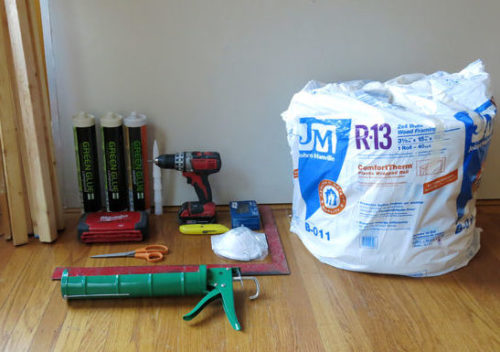
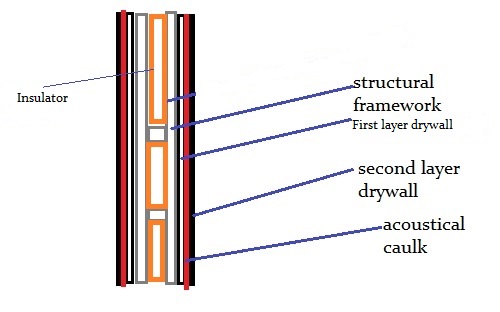
One thing you have to remember, we will build a decoupled wall. This wall is very effective in deadening the sound from the outside of your bedroom and dampening the noise from the inside of your bedroom to the outside. Firstly you have to provide materials as stated below:
- A frame that is enough to frame area as wide as your desired wall, you can make it from wood stick, metal frame, light metal, etc.
- R-13 fiber insulation, you can change it with coconut peat fiber, styrofoam, solid foam, etc, that is enough to cover an area as wide as your desired wall with the thickness as thick as the frame.
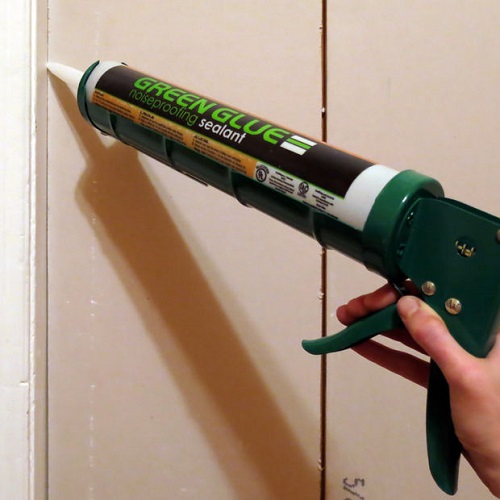
- Noise proofing compound as acoustical caulk.
- Sealant
- Full sized caulk gun to apply the noise proofing compound
- 5/8″ Drywall – enough for four layers
- 3″ Drywall screws
- Rock knife
- Drill
- Ruler
- Masking tape
- Face mask, gloves, glasses for your safety
Build Frame for the Wall
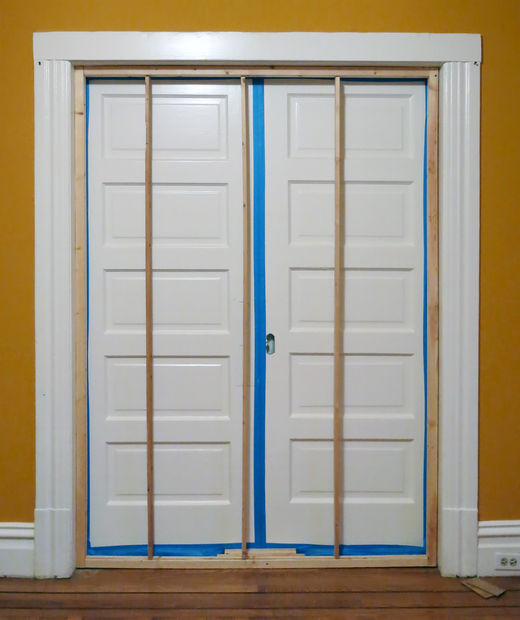
Firstly, create a frame as wide as your desired wall. Make sure that there will be a 3″ gap between two drywalls. You can make it from lumber or metal. Add some layer of tape to protect the floor from the frame.
Cut Drywall as Wide as Your Desired Wall
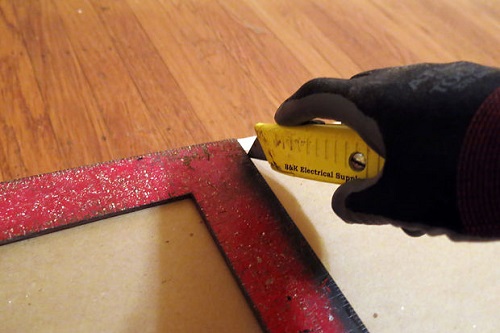
Cut the drywall to the size of your desired wall with rock knife. Make sure there will be 4 pieces of drywall in the same size to create a double sandwich wall. If it is not enough to have a whole piece, you can use a stud to seam the drywall along to fit the same wide of your wall.
Attaching the First Drywall to the Frame
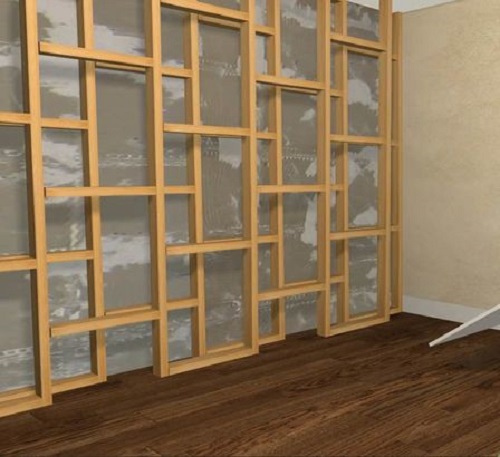
Attach the first layer to the frame. Use drywall screws every 15″ and so on. Patch up every seam and holes with sealant to stop sound leakage. Maybe it is not necessary to caulk all the drywall, but you have to make sure that everything has to be perfect, right?
Insulation
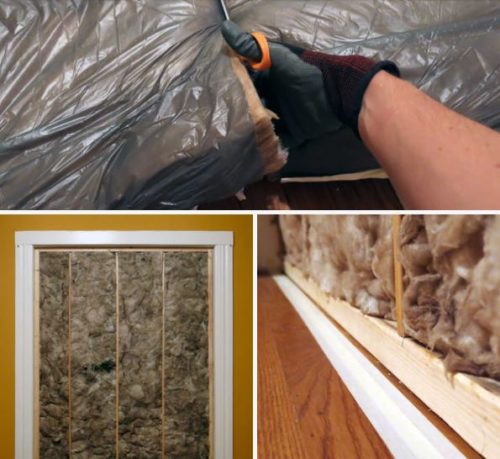
Add insulation to the frame after you attach the first drywall. You have to use your safety equipment as goggles, gloves, and mask. Sometimes synthetic insulation materials such as R-13 fiber insulation may be harmful to you. Set the insulation as thick as your desired wall thickness. Then, make sure you set the insulation as dense as you can.
Setting the Second Drywall
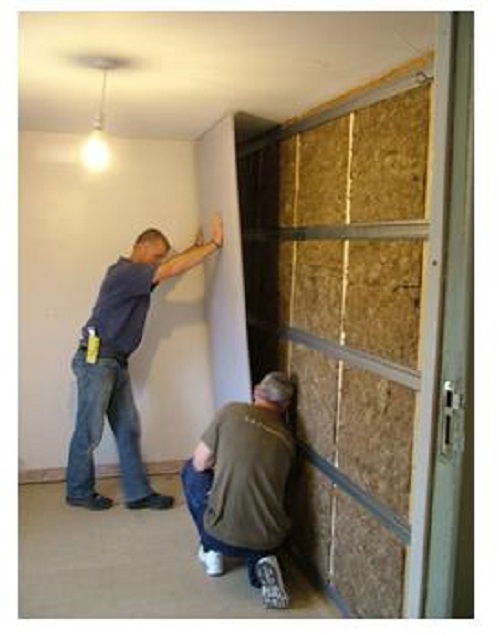
Attach the second drywall to the frame to cover the insulation. Then, repeat it as what you’ve done to the first one. Trim every seam on the drywall, and close all the leakage with caulk or sealant. Even a small hole in the drywall can transmit the noise inside your bedroom.
Attaching the Second Layer Drywall
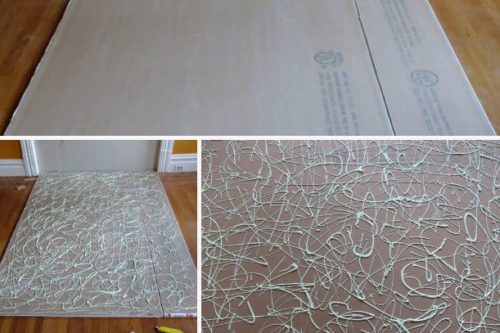
Place your second layer drywall close to your existing wall so you can attach it easily. Apply the noise proofing compound to the second layer drywall well. Then, attach the second layer to the first layer, while the glue is still wet, and screw around 17″ apart. Trim all the seam and close all the leakage with caulk. Repeat this to the other side of the wall. Voila! Now you have a soundproof wall bedroom.
Final Touch
After everything has been set and settled, maybe you cannot wait to give the final touch such as painting, decorating, applying decals, etc to lift the appearance of your bedroom. But one thing you have to remember, you have to keep the wall free from any leakage. If you use the nail on your wall to hang some pictures and paintings you need to apply the caulk to around the nail hole to stop the leakage.