Building the fence, it is not difficult way to do for now. Certainly, you want to have the fence as low cost as possible. If you want to install the fence but you have a low budget, perhaps temporary chain link fence may be your choice.
How to Install Temporary Chain Link Fence
The tools
- Post
- Chain
- Measure Tape
- Wire
- Swedge
- Tension band
- Fence Cap
- Bolts
- Bandsaw
- Pipe Cutter
The Steps
Step 1 – The first thing you want to do is set all of your ends and corner posts. To set your post, you want to take your tape to ground level and measure up 48″, set in concrete level the post. Once, your post or set then you want to set any gatepost. Make sure that the measurements are set up correctly. You can also use a stream line to cite your post.
Step 2 – Do not forget to measure the opening for a walk gate, add 4″ to the opening of a single gate, 6″ to the opening of a double gate all or your ends corners and gate post will be the same height. Actually, you want to make sure that your gates tops or level. Now, we are going to lay out our line post. Get the total length of each line and divide your spaces evenly. Making sure that none of the posts are over 10 feet.
Step 3 – Then, look down the line again and you will have marks kicked where your post go and then just spot your digger. Now, it is time to set the post. For line posts, the height on a four-foot chain link fence is between 45″ and a half and 46″. Set all of your post and concrete. You can use about 80 pounds of concrete for each post. Because the post holes should have at least a 6″ hole going 24″ into the ground. Certainly, when you are finished with your project go through and make sure all of your lines look straight. Furthermore, making sure that you did not bump any of the post.
Step 4 – After the post has been set, now we are going to install all the fittings on your end and corner post. These are tension bands notice, actually, there is a flat side and a curbside. Make sure you put the flat side on the side of the fence that the chain-link is going to inside and outside. For a four-foot fence, you will get three bands. While, for the corner, it will gets six bands. Alternate the directions for each line.
Step 5 – Then, place the two-way cap on for the top rail. Apply the nuts and bolts to the tension bands. The top band will sit down about 2″ under the top cap. The center band will go in the center of the line and then the bottom band will go about 4″ above the ground.
Step 6 – Now, put the line capsule on notice, there’s a curve loop to the lined top. Certainly, the loop faces the outside of the chain link the same side of the fence. Then, the chain link is going to hang on.
Step 7 – After that, install the top rail smooth side goes in to the top row. Use the swedge, so they just joint together. It is so simple to join the top row. Measure from the inside of the cap to the swedge, use the cut and it’s better to use the cut pipe with a portable bandsaw.
Step 8 – Now, you can use the rail ends. Make sure that you set your post 2″ higher than normal. For one way or two way bullet cap, you are at 48 for rail and you’d be at 50. Now, we are going to start hooking up the chain link. Put a tie on first, run your band through each link. Making sure that it goes into your tension bin and continue all the way down. Tighten up your tension bands a half-inch impact drill very well.
Step 9 – Now, we have to weave the chain link notice. You have a single strand and a double strand when you weave the wire together. Then, knuckle the loose ends and it is time to stretch the fence. You have to run a bar about 3 feet away from the end post. Running it through the links of your chain link. Apply a couple tie wire, so, you can keep the top grade of your fence. Straight while you stretch.
Step 10 -Then, warp come along above the middle bin center, apply the stretching bar. If you do not have a stretching bar, you may use the tension bars. For stretch this small, you are just going to give it a couple good stretches until you can’t pull the link together by hand. Find where you want to
cut your wire, don’t make it too tight. Run the tension bar down going through the link and the tension band. So, the stretch is complete and it’s time to tie the wire.
Step 11– Now, we are going to install the gate. By using the bolts and two holes that have drilled into the post. The holes are about 10″ down from the top and 14″ up from the bottom.
Step 12– For the double gate, we have the same process. For the double gate, you also need a sintered drop rod, so, we’re applying females that one will attach about 4″ up from the bottom. Apply your drop rod and you want about 4″ of slack to drop into the drop-in. We’re going to set line your gate up, when you find center, just drive in a stop. For larger gates, you want to concrete that into the ground. Then, set the screw the females on double gate to keep everything straight for a long time.
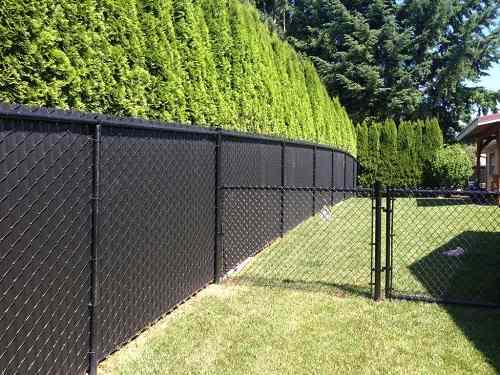
Step 13– Finally, look the beautiful chain link fence that you have made. If you do the project well, actually, you will get the great result as you want. Good Luck!
Furthermore, we show you a tutorial video about how to install the chain link fence from Buetts Fence. Hopefully, the video can help you in installing the fence.