Have you ever experienced water damage at your home? More often than not, this is caused by a leaking pipe or a broken sewer line. The culprits are typically roof leaks, clogged drains, and overflowing toilets. In most cases, either inclement weather or natural wear-and-tear triggers these problems. Water damage restoration can be stressful most of the time since you need time, effort, and money to fix these issues. Yet, it’s indispensable to act on this as soon as possible because it can pose some health risks.
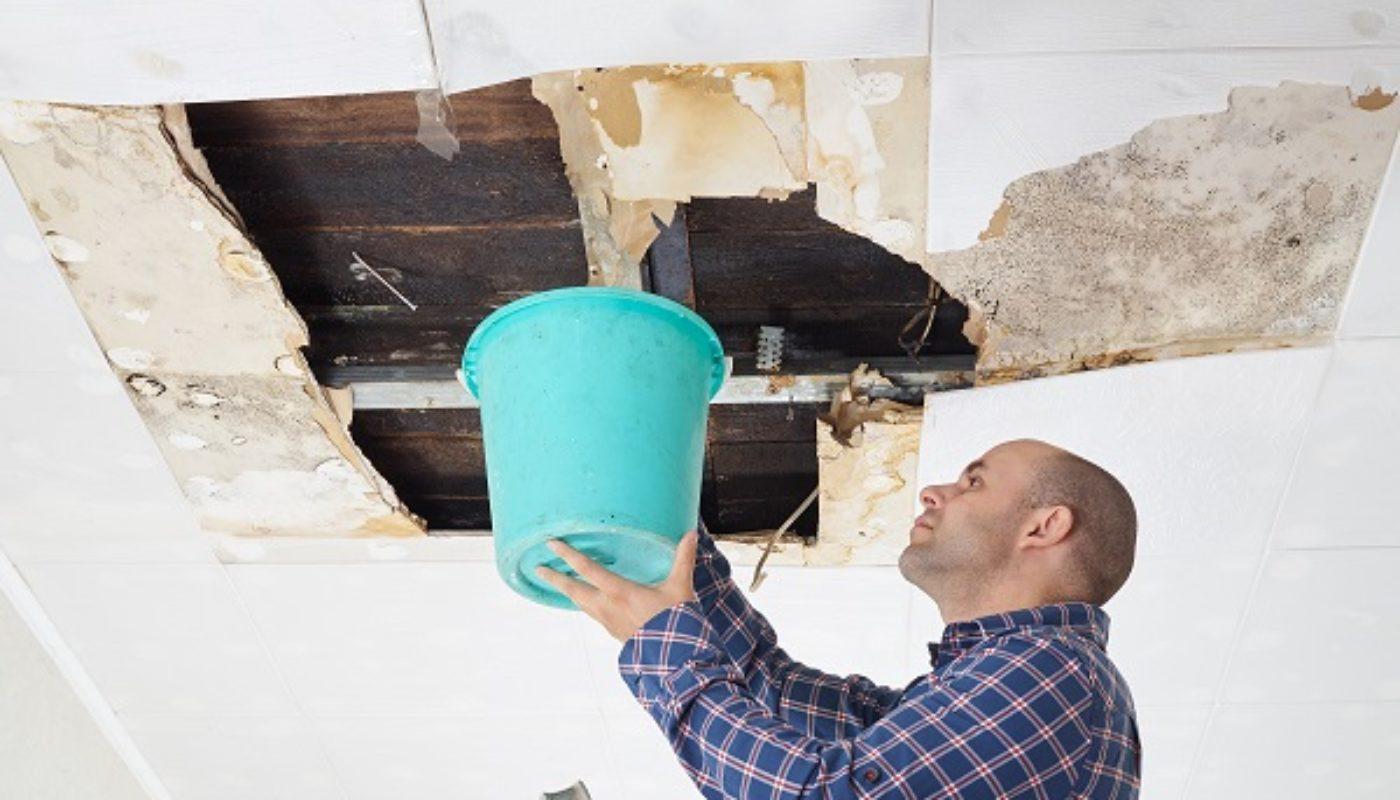
Water-damaged spaces such as the basement and kitchen may become rooms for contamination. When this happens, people living in the house become prone to diarrhea and other gastrointestinal problems. Aside from the health threats, neglected water-damaged areas could start more structural issues at home. In addition, molds and stains begin to be visible in the drenched areas.
If you don’t want to complicate your troubles further, you could look for a professional water damage restoration company. But before you get into it, here are a few tips for a water restoration project that may help you:
- Act Immediately
In the soonest possible time, you should find ways to fix the water damage. The longer it’ll take you to repair the affected areas, the more problems will arise. If you couldn’t fix it on your own, you could contact your local water damage restorers. One way is to search the web by typing ‘water damage restoration near me’ to find what’s best for you. You may need to read their reviews and look into their services in choosing the water damage restoration professionals.
- Disconnect Outlets
Before the restoration starts, make sure that the outlets are disconnected to avoid electrical troubles. Furthermore, you need to unplug all appliances, even the surrounding areas of the affected rooms. You may also need to recheck and retrace the wired connections inside the ceiling, floors, and walls. This way, you’d ensure the safety and protection of anyone who’s working on the restoration.
- Remove The Molds
Molds typically appear on water-damaged floors and walls. While most of them are easy to remove, you’d still need to be cautious as some molds are toxic. If you’re the one who’s removing the molds, you may wear a mask to avoid inhaling the spores molds produce. You could also use a scraper or a pressure washer if you want to keep your distance when you remove them. Afterward, put them in a bag for disposal. If there’s a more difficult mold situation, you may contact a mold expert to attend to this matter.
- Dry Everything Up
Water seeps into the core of walls and floors easily. When this happens, open the windows and doors to eliminate moisture inside the affected property. In addition, you could use heavy-duty dehumidifiers or high-powered fans.
Suppose the water is still dripping from affected house portions. In that case, you may use dry towels, especially if they’re made of porous materials. You may also use a vacuum to remove the excess water.
- Remove Heavily Soaked Materials
Materials like carpets, upholstery, and other fixtures containing foam should be removed from the area, especially if soaked in water. In this way, they’d stop dripping.
At the same time, water-damaged ceilings and floors should also be replaced if they’ve been soaked. The same goes for the drywall and wooden parts of the house already damaged by water. All of these may lose their durability and may give more problems than benefits to the homeowners.
- Save The Parts Of The House That Remain Useful
While you can’t salvage all the household items that got drenched, you could still avoid the others having further damages. You could still save water-damaged wooden floors and doors. Also, you could dry fixtures and furniture that could be used again.
To do this, you may use a sponge to clean the wet parts. If your sponge has almost been used up, you may cut the outer layer with a knife and have a new and clean layer. You may also use dry towels to sip water. Add fans to dry the furniture, fixtures, and walls thoroughly.
- Clean And Disinfect
Aside from the musty smell, the damaged areas could be homes to germs and bacteria. In this case, you need to disinfect them. You may start by using lukewarm or hot water in washing floors, boards, and walls that have been submerged underwater. Let these parts dry again with a dehumidifier or a fan before using bleach or a cleaning solution to sanitize the place. There are cleaning solutions in the markets you could buy and use for this purpose.
- Hire A Reputable Water Restoration Company
If there are too many problems for you to handle, you may contact a water damage restoration company. Usually, this service provider has equipment like pumps that could quickly remove the standing water and fix the damaged parts rapidly. They also have the muscles of moving and removing fixtures and household items.
In addition, most restoration services providers also use chemicals and tools to sanitize the affected places. Lastly, they could apply appropriate restoration to any type of water damage.
Wrapping Up
Water restoration projects can be tiring, much more in the part where you’re lifting fixtures and cleaning water-soaked floors and stairs. You also need to flip heavy furniture sets and move out carpets and upholstery. However, it’s necessary to fix this problem as soon as homeowners could because of various hazards. To restore the damaged portions of the house caused by pipe or roof leaks, you may choose between having DIY repairs or saving yourself from the troubles of restoring the damaged walls, floors, and fixtures by hiring professionals.
If you’re a homeowner who faces this dilemma, you may think about what you’ve read in this article before deciding about the restoration procedures. Either way, ponder which could give the best results for your home as it’s the most crucial factor to consider.


