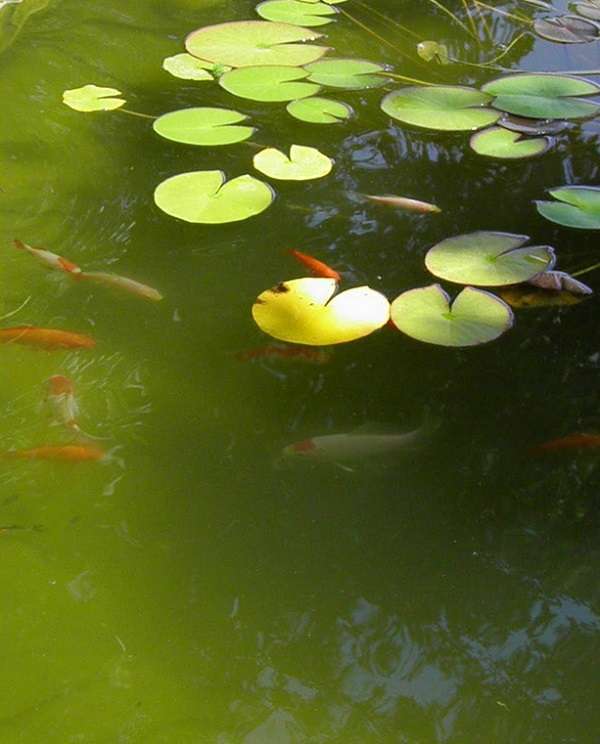
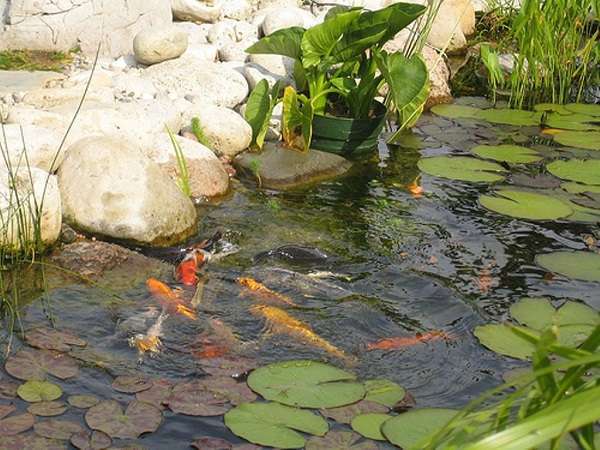
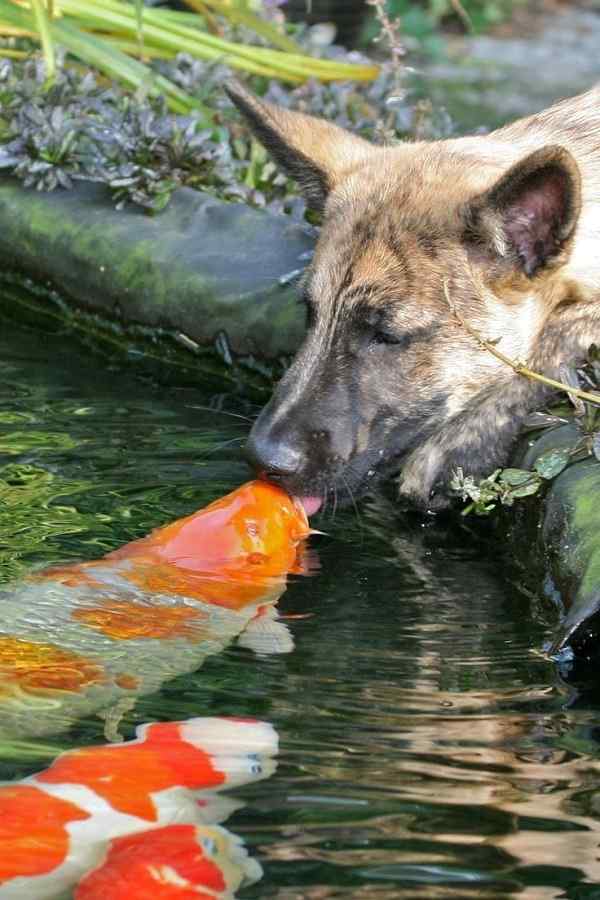
When you are decorating your backyard or pond, adding a fountain should be one of your primary considerations. The sound of the endless moving water is so exhilarating and relaxing. It will definitely enhance the beauty and comfort of your outdoor living space.
There are so many backyard’s fountain ideas with their own attractive and fascinating design. It is surely essential to have a beautiful fountain if you are about to install one because it should be joyful to watch too. The unique fountain style will not only beautify your garden but also amaze all the coming guests.
You can just easily buy the fountain in the market, with various prices. But mostly, the most beautiful and distinctive one is quite pricey. Then buying the usual one is your final decision.
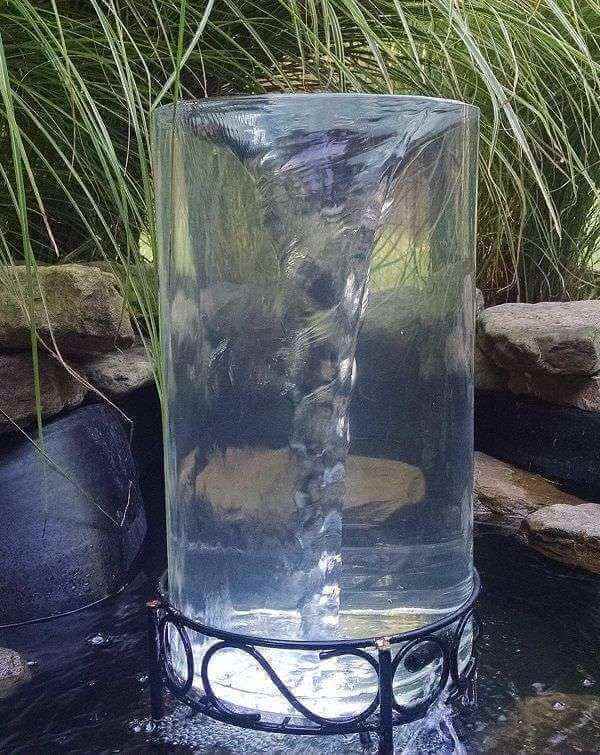
The Vortex Fountain perhaps one of the most popular fountain designs today, and it is originally created by the Tills Innovations. It is very understandable because the look of this fountain is absolutely fascinating and jaw dropping with its endless tornado water. It is like a real wow-factor for your outdoor space. However, the price of this sophisticated fountain is quite pricey, it is offered at around $2,500 for one unit. But don’t worry, you can make your very own Vortex Fountain by yourself easily. Just buy some affordable stuff online, then you are ready to build your own Vortex Fountain.
Check it out!
DIY Vortex Fountain
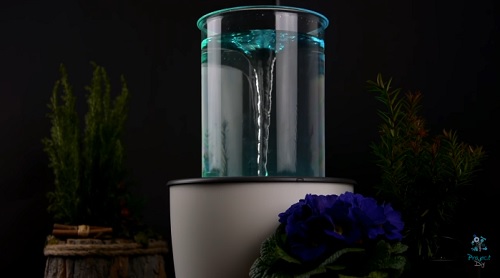
The project cost is around $185, you can get all the materials online or just go the local decor store. The fountain can be placed in the living room too, to add some water feature in the interior of the house. The led makes the fountain looks way more dramatic to enjoy in the evening. (Read also: How to Make Wine Bottle Fountain)
The materials that you will need:
- Transparent Acrylic Vase ($38)
- Aquarium Pump ($94)
- PVC Clear Tubing ($24)
- Power source 12 volts ($10)
- Waterproof LED Strip ($11.7)
- Flower pot + saucer ($8)
The tools that you will need:
- Cutter
- Electrical grill
How to make the vortex fountain:
- Make two holes in the bottom of the transparent vases, at its center and its side by the marker. The side hole should fit the brass diameter and the center one fits PVC tubing diameter.
- Mark the holes on the vase onto the saucer, grill the saucer to make te exact same holes.
- Place the elbow brass fitting in the side hole, then place the saucer.
- Make some small holes around the bottom part of the saucer.
- Fit the pump to brass using the PVC tube.
- Start to fill the water, and enjoy your Vortex Water Fountain!
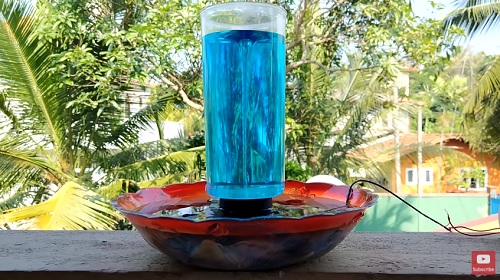
DIY Decorative Vortex Fountain
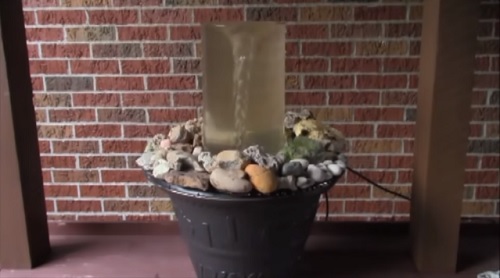
The next project is how to make a DIY Vortex Fountain but with a more decorative look. It has a gorgeous look and fits beautifully with the backyard surrounding. Moreover, the fountain is made in portable design so you can move it anywhere as you wish. You can easily make the fountain all by yourself by using easily available materials. Read also: Wine Bottle Fountain
The materials that you will need:
- Transparent Acrylic Vase
- Two 90 degree 1/2″ Elbows
- Four 1/2 PVC Couplings with Female Threads
- Two 18″ Flexible Risers with Male Connector
- One Big Sturdy Planters
- One Used Charcoal Grill
- Two Pond Pumps (One with T Joint)
- Decorative Pond Rocks
The tools that you will need:
- Dremel with Cutting Wheel
- Marker
- Measuring Tape
- 3/4″ Hole Saw
How to make the vortex fountain:
- Make 3 holes on the bottom of the vase by using the drill. One hole on the center and two others on its outer edges, all of them should be in the straight line patterns, so you will need the measuring tape to get it done.
- Attach the couplings on each of the pumps, screw it properly.
- Attach the riser into each coupling.
- Use the Dremel to cut a few of metal rods and grate so it can fit the hoses.
- Place the pumps with the risers attached on it inside the planter.
- Place the grate on top of the planter then put out the top of the riser through the grate.
- Attach the 90-degree elbows to the two holes of the vase’s outer edge. You need to place them inside the vase and adjust them to face in opposite position of each other. It’s so important to do, so elbows will shoot the watter in a swirling or vortex pattern.
- Screw the coupling to into the each of the elbows to secure them to the glass.
- Connect the male connector of the riser to the coupling of the elbow.
- Put the glass on the grate in a very even position, make sure that the couplings are placed down the grate.
- Fill the planter with water and make sure that the pumps are fully submerged.
- Turn on the planter and you need to keep filling the planter with water to the point that the water falls from the vase.
- Decorate the grate with pond rocks until it’s fully covered.
- You can move the fountain easily and use other bases like a plant stand.
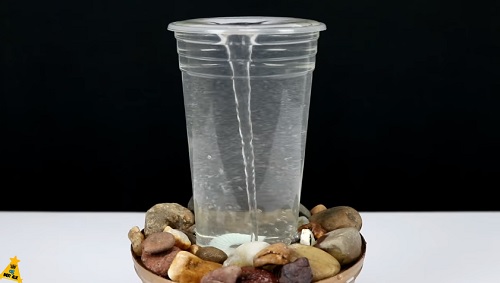
DIY Simple Vortex Fountain
This is an intereseting DIY Vortex Fountain that you can add to your home improvement project plan. It looks so catchy with its colorful look so it will style up your outdoor living space beautifully. The project is so simple in which you won’t have to spend a lot of money and elbow grease.
The materials that you will need:
- Transparent Acrylic Vase
- PVC Clear Tubing
- Colored Decorative Plastic Bowl
- 24 mm Micro Motor
- Mini Micro Submersible Motor Pump
- Decorative Pond Rocks
- 3″ PVC Pipe (cut short with about 5 cm tall)
The tools that you will need:
- Electrical Drill or Hot Stick Iron
- Scissor
- Glue Gun
How to make the vortex fountain:
- Drill a hole on the outer edge of the bottom of the vase which fits the diameter of the PVC clear tube. You can also use the heated iron to make the hole.
- Drill a smaller hole in the center of the vase’s bottom, you can use the scissor to make the whole of the vase is not really thick and sturdy.
- Drill some holes on the body of the pipe that will be used for the water to flow.
- Glue-gun the 3″ PVC pipe to the center of the plastic bowl which will work to support the vase.
- Attach the submersible pump to the PVC clear tube properly.
- Glue-gun the pump to the center of the bowl and close to the pipe support.
- Hide the pump and PVC clear tub with the decorative pond rocks.
- Fill the bowl with the water, make sure that you add enough water to make it falls from the vase.
- The fountain is quite lightweight so it has good portability.
DIY Small Vortex Fountain
For you who want to have a stunning table centerpiece, this DIY Vortex Fountain is a clever inspiration that you can try. It’s made in smaller design which fits your dining or bistro table. It will surely make the table look way more attractive.
The materials that you will need:
- Small Plastic Glass or Vase
- Plastic Bowl or Small Bucket with Cover
- Marker
- PVC Clear Tubing
- Bending Straw (cut until you get the neck and the head with the bending part)
- Aquarium Pump (you need to cut half of the cable)
- Decorative Pond Rocks
The tools that you will need:
- Drill or Hot Stick Iron
- Glue Gun
How to make the vortex fountain:
- Use the marker to mark a hole on the outer edge of the bottom of the bucket, and use the hot stick iron to make the hole. Make sure that the hole fits the cable of the pump.
- Place the pump inside the bucket and put out the cable through the hole. Glue-gun the cable to secure it.
- Use the marker to mark some holes on the cover of the bucket, and use the hot stick iron to make the holes. The holes will be used to flow the water.
- Use the marker to mark a hole on the side of the glass’ bottom, and use the hot stick iron to make the hole. Make sure that the hole fits the diameter of the straw.
- Make another hole which is closed to the center of the bucket and it has to fit the straw.
- Attach the straw to the PVC tube then attach them to the pump.
- Close the bucket with the cover and make sure that the straw is out of the cover properly.
- Place the glass on the cover and let the straw comes through the hole on the side of its bottom.
- Bend the neck of the straw and secure it with the glue-gun.
- Make another hole in the center of the glass and let it through the cover of the bucket too.
- Open the bucket cover slightly and fill the water in, close it back.
- Connect the cable of the pump properly, use the glue-gun and duck tape to secure it.
- Place some decorative rocks on the bucket cover to hide the holes.
- Turn the pump on and make sure that the water flows beautifully.
Pick one!
So those are some amazing DIY Vortex Fountain Ideas which are created by some creative people. They are surely inspiring to try when you are about to enhance the beauty of your outdoor living space. You just need to pick the one that you really love and suits the existing decoration of your backyard.
All of those DIY Vortex Fountain projects are basically the same, some use different methods or materials. You can choose one project which really fits your needs and skill.
Those DIY Vortex Fountain Ideas are such a fascinating water feature which surprisingly cost much lower than buying the original one. The materials are easily available, and the steps are easy to follow. You can build the bigger fountain by purchasing the bigger transparent vase, and you will also need a bigger pump for it.
For sure this project can be a very fun thing to do this summer so you can have an outdoor living space which looks so attractive in a very creative way. Make all the coming guests to be inspired and amazed by your very own DIY Vortex Fountain.
Always be careful in executing the project, and wear some safety stuff if it’s necessary. This project is not recommended to follow by those who are under 17 since it involves some risky steps.
To help you more, below we have some easy and simple tips to decorate your pond or your patio with your DIY Vortex Fountain.
DIY Vortex Fountain Tips
-
Make it as a Focal Point
Vortex fountain is a uniquely attractive water feature which will definitely grab everyone’s attention. Therefore, you have to make it as one of the major focal points no matter where you put it. Place the Vortex fountain in the spot that will become the focus of the area like the front side of the pond, the center of the table or next to other focal points.
-
Match the Decor
It’s a much better idea to make your Vortex fountain look similar to the decoration of your pond or your patio. It will create a nicely harmonious look and make the fountain become a part of the space.
For instance, you can use the decorative pond rocks if you have a pond with a similar decorative element. Then, you can also have fun with the food coloring or colorful ink to match the color of the water with the main color of your patio.
-
Use Repurposed Stuff
Instead of purchasing the materials for your DIY Vortex Fountain, you can use some old stuff to save more budget. Some projects allow you to use repurposed things for the material so you don’t need to prepare a huge budget for it.
Well, happy creating your very own DIY Vortex Fountain at your home now!