Do you want to increase the security and energy effectiveness of your house? A storm door closer installation can be the answer you require. A mechanical device called a storm door closer makes sure that your storm door closes securely and smoothly, keeping the elements out and eliminating air leaks and drafts.

This article will provide you with step-by-step directions on how to install a storm door closer by yourself. It will also include a list of the supplies and tools you’ll need, as well as troubleshooting advice for typical problems.
(Read also: Exploring the Cost and Considerations for Installing an Exterior Basement Door)
We’ll look at the advantages of DIY installation as well as the advantages of having a properly installed storm door closure. With our assistance, your storm door will be perfectly shutting in no time!
How to Install a Storm Door Closer
Introduction
- Explanation of What a Storm Door Closer is
A mechanical mechanism called a storm door closer is fitted on a storm door to make sure it closes securely and smoothly. It operates by using a mechanism that is spring-loaded to regulate the force and pace of the door shutting. The closer body and the arm of a storm door are its two primary parts, and they are often joined to the door frame.
- Importance of Having a Storm Door Closer Installed
Installing a storm door closer is crucial for a number of reasons. First off, making sure the door closes tightly helps to stop drafts and air leakage. Costs associated with heating and cooling can be decreased and energy efficiency can be improved.
Secondly, it increases the security of your house by preventing accidental door openings. Finally, a storm door closer can help keep out the weather—including rain, wind, and snow—as well as keep pests and insects out of your house.
- Benefits of DIY Installation
The advantages of doing your own storm door closer installation over hiring a specialist are numerous. In the beginning, it can help you save money on installation costs, which can be quite high. Second, it can make you feel good about yourself for finishing a task by yourself. For homeowners that enjoy using tools and following directions, it may be a fun and gratifying DIY project.
- Benefits of Having a Well-installed Storm Door Closer
Having a properly placed storm door closer to your home has many advantages.
- First off, by keeping cold air out and warm air in, a storm door closer can help your home use less energy. Your energy costs may drop as a result, and your living space may become more pleasant.
- Second, a properly placed storm door closer can aid in reducing noise and stopping drafts. If you live somewhere with harsh weather, like high winds or a lot of rain, this is very advantageous.
- By ensuring that your doors close and lock securely, a storm door closer can also help to increase the security of your home. This can help keep your family and possessions safe and prevent intruders.
- Finally, a storm door closer can help your door last longer by minimizing the wear and tear it receives from slamming shut. Long-term, this can save you money on maintenance and replacement expenditures.
Overall, adding a storm door closer can benefit your home in many ways, including better security, less noise, and improved energy efficiency.
(Read also: 15 Household Areas That Need Regular Maintenance)
Tools and Materials Needed
- List of Necessary Tools and Materials
- Storm door closer kit
- Drill
- Screwdriver
- Measuring tape
- Pencil
- Screws
- Anchors (optional)
- Brief Explanation of Each Item
- Kit for installing storm door closers: This kit contains the storm door closer body, arm, screws, and brackets.
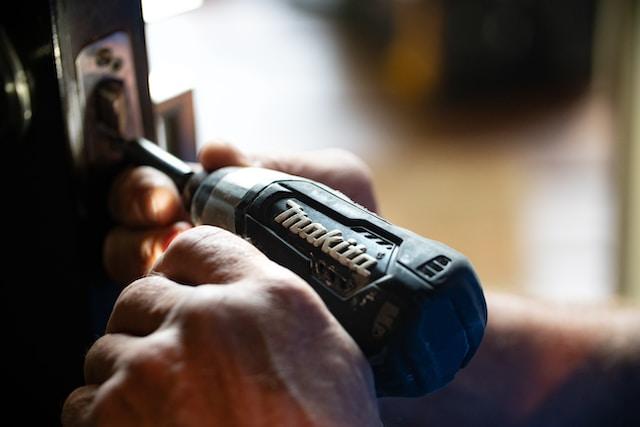
- Drill: To drill holes in the door frame for the screws, you’ll need a power drill.
- Screwdriver: To tighten screws and alter the tension of the storm door closer, use a screwdriver.
- Measuring tape: Using this instrument, you may measure the space between the door and the jamb and work out where the storm door closer should go.
- Pencil: The locations of the door frame’s drilling holes will be marked with a pencil.
- Screws: will be utilized to secure the closer body and arm to the door frame and are provided in the storm door closer kit.
- Anchors (if required): If the material used to construct the door frame is too flimsy to hold the screws, anchors may be required to add further stability.
(Read also: How to Check if Glass is Oven-Safe with These 12 Steps)
Preparing for Installation
- Steps to Follow Before Installation
It’s crucial to read the installation instructions included with the storm door closer kit before starting the installation process. You must also make sure you have all the required tools and supplies available. Last but not least, check that the door is clear of all debris because this can affect how well the closer works.
- Measuring the Storm Door
You must measure the door and frame to make sure the storm door closer is installed properly. Measure the distance between the top of the door and the top of the door frame using a measuring tape. Then, when the door is closed, measure the space between the door and the jamb. You can use these measurements to decide where the closer body and arm should go.
- Choosing the Right Location for the Closer
On the same side of the door as the hinges, the closer should be mounted. Based on the measurements you acquired in the previous stage, mark with a pencil where the closest body and arm will be. The closer’s arm and body should be mounted on the door and doorframe, respectively.
Make sure the closer arm can be attached to the door in that location without interfering with the handle or latch. After marking the closer’s location, use a drill to create the screw pilot holes. Use anchors to offer extra support if the door frame is fragile.
Installation Steps
- Step-by-step Instructions On How to Install the Storm Door Closer
- Using the included screws, first, fasten the closer body to the door frame. Ensure that the closest body is stable and level.
- The arm bracket should then be secured to the door with the included screws. Make sure the arm is level and that it is fastened firmly.
- Using the supplied screws, attach the jamb bracket to the door frame. Make sure it is firmly connected and level.
- Connect the closer arm to the closer body and the arm bracket. Ascertain that it is firmly fastened and that it moves easily.
- To ensure that the closer is functioning properly, test the door. The door should latch firmly and close smoothly.
- Mounting the Closer
Hold the closer body against the door frame where you previously designated it to mount it. To secure the closer body to the door frame, use the provided screws. Verify that the closer body is firmly fastened and leveled.
- Attaching the Bracket and Jamb Bracket
Utilize the supplied screws to fasten the arm bracket to the door. Make sure it is firmly connected and level. Afterward, use the supplied screws to secure the jamb bracket to the door frame. Make sure it is firmly connected and level.
- Connecting the Closer and Bracket
Connect the closer arm, closer body, and arm bracket. Ascertain that it is firmly fastened and that it moves easily. To ensure that the closer is functioning properly, test the door. The door should latch firmly and close smoothly.
- Adjusting the Tension on the Closer
To guarantee that the door closes securely and smoothly, adjust the closer’s tension as necessary. The closer’s adjustment screws can be used to do this. Make that the door latches securely and that the tension is not too tight or loose.
(Read also: Quartz Countertop 101: Maintenance and How to Prevent Heat Damage)
Troubleshooting
- Common Problems During Installation
- Door won’t close smoothly: The closer arm may be too short or too long if the door won’t close smoothly. It might also be the result of the closer body or arm bracket’s erroneous alignment.
- Door slams shut: When a door closes abruptly, it may be because the closer’s tension is too tight. The closer arm might not be fitted at the proper angle, for another reason.
- Door won’t stay open: A loose closer tension could be the cause of a door that won’t stay open. The closer arm might not be fitted at the proper angle, for another reason.
- Solutions to Fix the Issues
- If the door won’t shut smoothly, make sure the closer body and arm bracket are attached properly. Adjust the arm as necessary if it is too short or lengthy. You might also need to change the closer’s tension.
- Adjust the closer’s tension if the door slams shut to make sure it is not excessively tight. Ensure that the closer arm is mounted at the proper angle. The closest body or arm bracket’s position might also need to be changed.
- If the door won’t stay open, tighten the closer’s tension to make sure it’s not too loose. Ensure that the closer arm is mounted at the proper angle. The closest body or arm bracket’s position might also need to be changed. To keep the door open, you can also buy a doorstop if necessary.
(Read also: The Difference Between a Painter and a Decorator)
Conclusion
- Final Thoughts On Installing a Storm Door Closer
A few simple tools and materials are all that is required to complete the installation of a storm door closure. By keeping warm air inside and cold air outside, it can increase your home’s energy efficiency. It can also lessen noise and prevent drafts.
You should be able to install a storm door closer without encountering any significant difficulties if you follow the instructions provided in this article and pay attention to typical concerns and how to fix them. However, it is always a good idea to seek the help of a professional if you are uncomfortable with DIY projects or if you run into any problems while installing.


