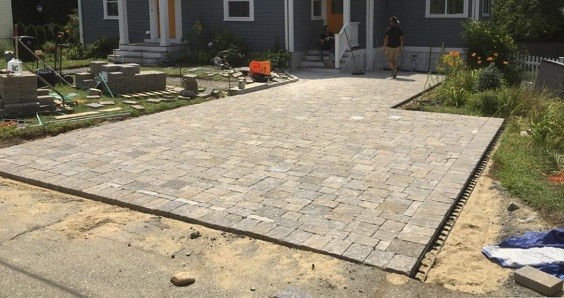
There are various kinds of patio that are mainly determined by the material that builds its base. The most popular option is the paver patio. The main reasons why this kind of patio is adored by many homeowners are due to its practicality, versatility, and durability.
Moreover, you can build your own paver patio all by yourself at home without any needs to hire a contractor. By using some affordable and easily-available materials, you can have a paver patio built in your backyard. Basically, you just need to lay the pavers on the desired space of your backyard. Therefore, the paver patio is a very worth option that you can add to your DIY project list.
(You may also like: How to Light a Living Room with No Overhead Lighting | Tips)
Here, we’re going to share a simple tutorial about how to lay patio pavers which is so tempting to try right away!
How to Lay Patio Pavers on Dirt
Remove the Grass Around the Space
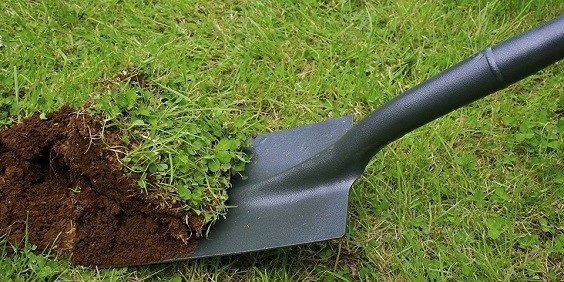
The very first step is that you have to remove any grass that grows around the desired space where you want to build the patio. You have to make sure that you’re not only removing the grass that comes out from the dirt but the root as well. If you leave the root system of the grass behind, they may grow back on the patio.
Prepare these materials:
- Twine
- Stakes
Prepare these tools:
- Tape Measure
- Hammer
- Work Gloves
- Spade
Follow these steps:
- Measure the area that you’re going to lay the pavers on then mark it by using twine and stakes. remember to also measure the height of the patio.
- Dig the grass until you remove them completely to their root.
- Make sure that you also remove other debris.
- You can transplant the removed grass on other space of the yard instead of wasting them.
(Check this out: 12 Effective Steps on How to Get Algae Out of Pool | DIY Tutorial)
Level the Land
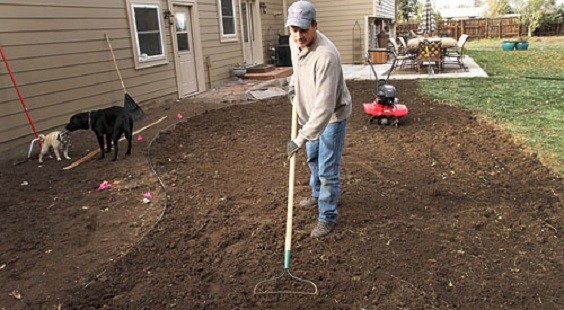
In order o make the pavers inline properly, you have to level the land instead of placing them directly. Using clean fill dirt which is free from debris, organic matters, and toxins are highly recommended since it offers you a much better result.
- Fill the area that you have marked with the clean fill dirt.
- Make sure that the dirt perfectly reaches your desired height or you may want to make the level of the dirt a little bit higher than the twine since the compacting step may lower the dirt.
Compact the Dirt
The next step is compacting the fill dirt that you have added to the desired area. You have to make sure that the land is perfectly compacted until it feels stable. It will ease you tho place the pavers.
Prepare these tools:
- Work gloves
- Hand tamper
Follow these steps:
- Pound the exposed land by using the hand tamper
- Use strong force so you can get perfectly-compacted dirt.
Place Geotextile Fabric
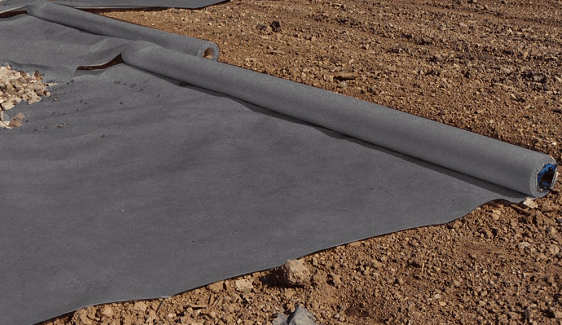
Geotextile fabric can enhance the durability of your paver patio by firming the base, preventing the growth of grass, and improving drainage. It’s an important step that you have to keep in mind.
You just need to lay down the fabric on the compacted dirt. Then, secure it by using some spikes.
(Recommended to read: Easy Tricks On How To Keep Small Bathroom Neat and Organized)
Place Edge Restraints
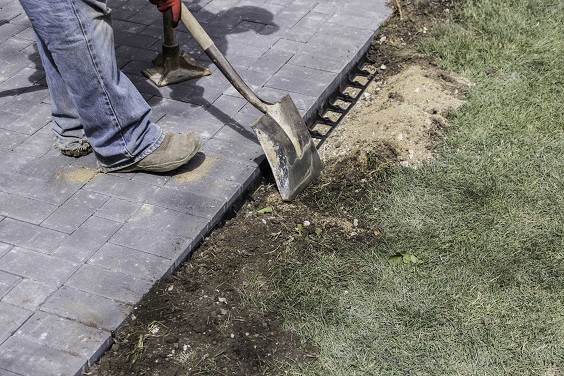
Edge restraints work to prevents the pavers to move to the softer surrounding or to keep the pavers in a compact position.
- Place the edge restraints (which are made of metal or wood) on the outer wall of the dirt.
- Secure the restraints by using nail spikes.
Place Down the Pavers
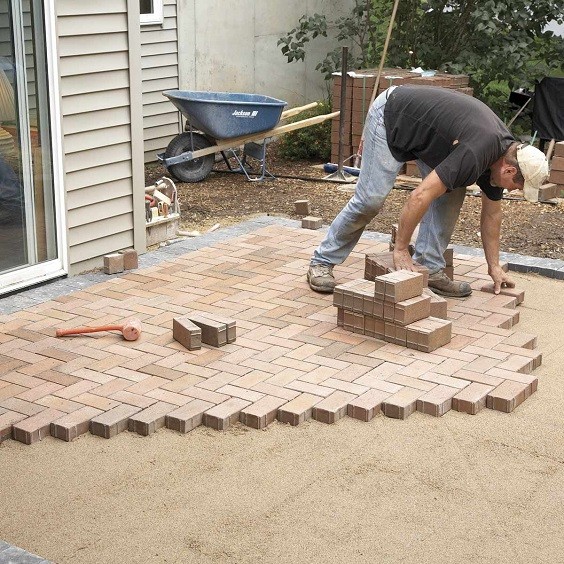
Now, it’s time for you to lay down the pavers. You can place them in any pattern as you desire.
- To ease the step, you need to start placing down the pavers from one corner of the area.
- Use wood board and hammer to embed the pavers in the dirt.
Pour Stone Dust
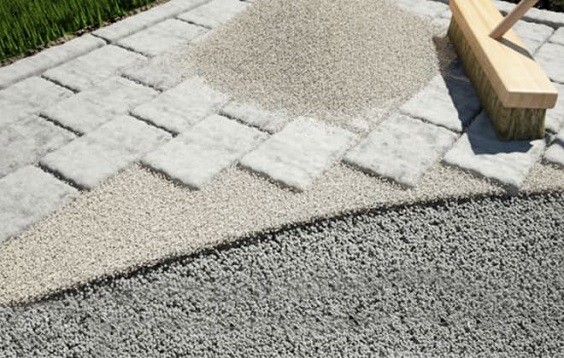
The last step is to fill the crevices between the pavers by stone dust. It doesn’t only fill the spaces but also prevents the grass to grow around.
You just need to simply pour and sweep the stone dust into the tiny spaces and crevices between the pavers. Make sure to clean up the remaining dust after you finish the step.
(Read also: How To Organize A Coffee Station In The Kitchen?)
So that’s the simple tutorial about how to lay patio pavers on dirt that you can copy easily without spending high cost. The steps are quite simple to follow especially if you are familiar with some DIY home projects.
Choosing pavers over the other materials to build a patio is never a bad idea. If you maintain it properly on a regular basis, you can have a pavers patio that looks and feels so inviting all the time. Below, we share some simple tips on how to maintain a pavers patio that you can apply:
- Sweep it Regularly – The falling leaves, dirt, branches, and other unwanted debris may fall onto your pavers patio. Do not just sit and watch, quickly sweep them off before they go piling in no time.
- Absorb Spilling Liquid – Dealing with stains on the pavers patio can be quite tricky if you let them there overtimes without cleaning them. Immediately absorb and clean up any liquid and oils that spill on to the surface with commercial products or DIY solution before they get absorbed into the pores of the pavers.
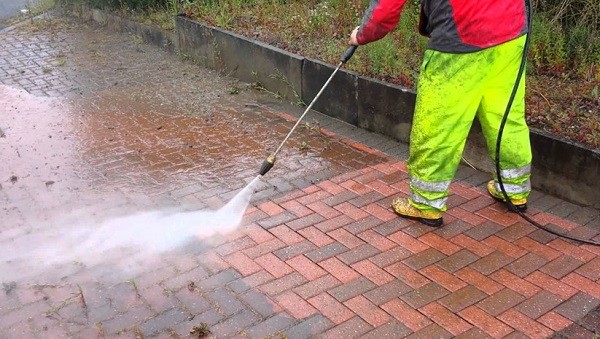
- Deep Clean It – Besides regular easy cleaning, you also need to deep clean your patio pavers. Some contractors offer this kind of service which usually involves pressure washer as the main act. If you are familiar with using the machine, you can just rent one and deep clean your patio all by yourself.
(See also: How to Hang String Lights in Backyard without Trees with Only 3 Steps)
So let’s add this tutorial on how to lay patio pavers on dirt to your DIY projects list and make sure to stay safe by wearing the recommended safety gear!