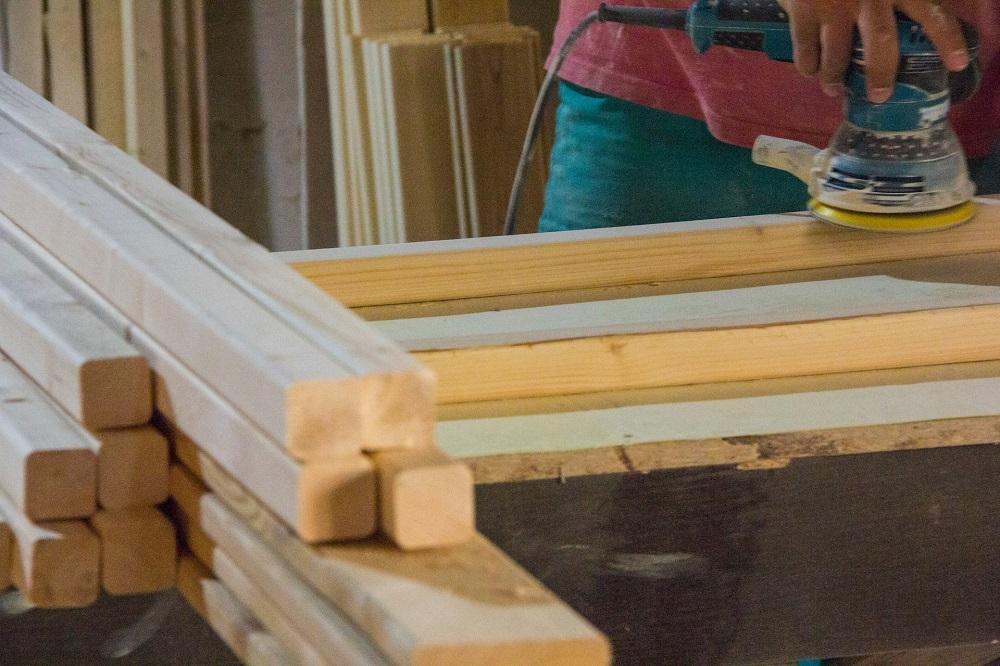
Sanding wood is a process that involves using abrasive materials to remove small amounts of wood from a surface, creating a smooth and even finish. Sanding is typically done before applying a finish, such as paint, stain, or varnish, to prepare the surface and ensure proper adhesion of the finish.
There are many different types of sandpaper available, each with a different grit rating. The higher the grit rating, the finer the sandpaper and the smoother the finish it will produce. It’s important to choose the right grit for the job, as using too coarse sandpaper can leave visible scratches on the wood while using too fine sandpaper can result in a surface that is too smooth and won’t hold a finish properly.
Before sanding, it’s important to make sure the wood surface is clean and free of any debris or dust. A clean surface will ensure that the sandpaper can make good contact with the wood and remove material evenly.
When sanding, it’s important to use a light touch and let the sandpaper do the work. Too much pressure can cause uneven sanding and leave gouges in the wood. Sanding should be done in the direction of the grain of the wood, as sanding against the grain can cause scratches that will be visible after the finish is applied.
After sanding, it’s important to remove all the dust from the surface before applying a finish. A clean surface will ensure proper adhesion and a smooth finish.
(We would recommend this: 15 Household Areas That Need Regular Maintenance)
How to Sand Polyurethane Between Coats
What is Polyurethane?
A polymer is a substance composed of extensive chains of identical building blocks, such as polyurethane. Foam insulation, coatings, adhesives, and elastomers are just a few examples of the many uses for polyurethane, a versatile synthetic substance.
By reacting a polyol (a form of alcohol) and a diisocyanate, polyurethane is created (a type of chemical that contains two isocyanate groups). The term polyurethane comes from the reaction’s creation of a urethane linkage.
A variety of characteristics, such as hardness, flexibility, and resistance to heat, chemicals, and abrasion, can be engineered into polyurethane. It can be used to create pliable and rigid foam insulation as well as coatings that shield surfaces like furnishings, floors, and other objects. Composite materials like fiberglass and carbon fiber can adhere together with polyurethane as an adhesive.
Sanding Polyurethane Between Coats Benefits
There are several reasons why sanding polyurethane between coats is important. Those are:
- Smoothness: Sanding between coats of polyurethane helps to create a smooth and even finish. Even with careful application, each coat of polyurethane can leave behind small imperfections like brush marks, bubbles, or dust particles. Sanding the surface between coats helps to remove these imperfections and create a smooth surface for the next coat of polyurethane.
- Adhesion: Sanding the surface between coats of polyurethane helps to create a rougher surface, which improves the adhesion of the next coat of polyurethane. The rough surface created by sanding provides a better surface for the next coat of polyurethane to adhere to, reducing the likelihood of the next coat peeling or chipping off.
- Appearance: Sanding between coats of polyurethane helps to create a more uniform appearance. By removing any imperfections in the previous coat of polyurethane, sanding helps to create a more consistent appearance across all the coats.
- Durability: Sanding between coats of polyurethane helps to increase the durability of the finish. Each coat of polyurethane adds a layer of protection to the wood, and sanding between coats helps to ensure that each layer is properly adhered to the previous layer, creating a stronger and more durable finish.
(We would recommend this: How to Increase Kitchen Counter Height)
Materials and Tools Needed
Here are the materials and tools you will need to sand polyurethane between coats:
Materials:
- Fine-grit sandpaper (220-grit or higher)
- A soft cloth or tack cloth
- Polyurethane
Tools:
- Sanding block or sanding sponge (optional)
- Dust mask (optional)
- Safety glasses (optional)
Optional tools:
- Orbital sander or palm sander with fine-grit sandpaper (if sanding a large surface area)
- A vacuum cleaner with a soft brush attachment (if sanding a large surface area)
It’s important to note that safety should always be a priority when working with any tools or materials. Wear safety glasses to protect your eyes from dust particles and a dust mask to avoid breathing in harmful dust. Additionally, make sure to work in a well-ventilated area to avoid inhaling fumes from the polyurethane.
(We would recommend this: How to Make a Wood Beam with 2×8 Boards)
How To
Here is a step-by-step guide on how to sand polyurethane between coats:
- Wait for the polyurethane to dry: Before sanding between coats, you need to wait for the polyurethane to dry completely. The drying time varies depending on the brand and type of polyurethane you’re using, so make sure to check the manufacturer’s instructions for recommended drying times.
- Choose the right sandpaper: For sanding between coats of polyurethane, you’ll want to use fine-grit sandpaper, such as 220-grit or higher. Fine-grit sandpaper will remove any imperfections in the previous coat of polyurethane without removing too much material or creating deep scratches on the surface.
- Clean the surface: Before sanding, make sure to clean the surface of the wood to remove any dust, dirt, or debris. You can use a soft cloth or a tack cloth to gently wipe the surface and remove any particles that could interfere with the sanding process.
- Sand lightly and evenly: When sanding between coats of polyurethane, use a light touch and sand evenly across the surface. Sanding too aggressively or in one spot can create low spots or uneven areas on the surface. Sand with the grain of the wood, following the natural direction of the wood fibers.
- Check the surface: After sanding, use a clean cloth to wipe the surface and check for any imperfections that may still be visible. If necessary, sand the surface again with a light touch to remove any remaining imperfections.
- Clean the surface: Once you’re satisfied with the sanding job, use a soft cloth or a tack cloth to clean the surface and remove any dust or debris.
- Apply the next coat of polyurethane: Once the surface is clean and free of debris, you can apply the next coat of polyurethane. Follow the manufacturer’s instructions for applying the polyurethane, and repeat the sanding process between each coat of polyurethane.
(We would recommend this: How to Create a Stunning Lawn with the Right Grass)
More Tips
Here are some additional tips to keep in mind when sanding polyurethane between coats:
- Avoid over-sanding: When sanding in between coats, it’s crucial to use a light brush and refrain from over-sanding. If you sand too vigorously, you risk removing too much substance or leaving behind scratches that are challenging to remove.
- Sand evenly: Follow the natural orientation of the wood fibers when sanding the surface to ensure even sanding. By doing this, low spots or uneven surface regions will be less likely to be created.
- Verify your work: When you’re finished sanding, wipe the surface with a clean towel and look for any remaining flaws. If required, lightly sand the area once more to remove any last-minute flaws.
- Use the right sandpaper: Use fine-grit sandpaper, such as 220-grit or higher, to sand between coats. Using a coarser grit can create deep scratches that are difficult to remove.
- Clean the surface thoroughly: Prior to and following sanding, make sure to completely clean the surface to get rid of any dust or debris. The polyurethane will adhere correctly and produce a smooth finish as a result of this.
- Allow adequate drying time: Make sure to follow the manufacturer’s instructions for drying time between coats of polyurethane. Rushing the drying process can lead to a less durable finish.
Here are other dos and don’ts points that you may want to take note of before doing the sanding process.
Do:
- Use fine-grit sandpaper, such as 220-grit or higher, to sand between coats.
- Sand evenly, following the natural direction of the wood fibers.
- Check your work and sand again if necessary.
- Clean the surface thoroughly before and after sanding to remove any dust or debris.
- Allow adequate drying time between coats of polyurethane.
Don’ts:
- Sand too aggressively or use coarse-grit sandpaper, as this can create deep scratches that are difficult to remove.
- Sand against the grain of the wood, as this can create uneven areas on the surface.
- Forget to check for imperfections after sanding, as this can result in a less-than-perfect finish.
- Use a dirty cloth or tack cloth, as this can leave behind debris that will interfere with the finish.
- Rush the drying time between coats of polyurethane, as this can lead to a less durable finish.
(We would recommend this: How to Estimate the Number of Concrete Bags Needed for a Project)
Sanding polyurethane between coats is an important step in achieving a smooth, even, and durable finish for your woodworking project. By sanding between coats, you can remove imperfections, improve adhesion, and create a more uniform appearance.
To sand polyurethane between coats, you will need fine-grit sandpaper, a soft cloth or tack cloth, and polyurethane. Optional tools include a sanding block or sponge, an orbital or palm sander, a vacuum cleaner with a soft brush attachment, safety glasses, and a dust mask.


