If you have lattice in your home, you are aware of how crucial it is to maintain its aesthetic appeal. It not only gives the exterior of your house or outdoor area an aesthetic touch, but it also serves a practical purpose by offering privacy or a base for climbing plants.
Staining a lattice is one of the best ways to keep it safe and improve its appearance but it can be challenging to determine which staining technique is best for your lattice given the wide range of options available. The various techniques for staining lattice will be covered in this tutorial, along with advice on how to pick the best stain for your purposes and how to care for stained lattice for many years to come.
This guide covers everything you need to know to finish the job properly, regardless of whether you’re an experienced DIYer or a novice stainer.
(Read also: Exploring the Cost and Considerations for Installing an Exterior Basement Door)
Below we have prepared some details with tips and tricks that you can use as a reference before staining your lattice. Just keep scrolling down and you’ll be ready to start your DIY project!
Staining Lattice: Which Method Is the Best?
Introduction
- Explanation of What Lattice is and How It’s Used
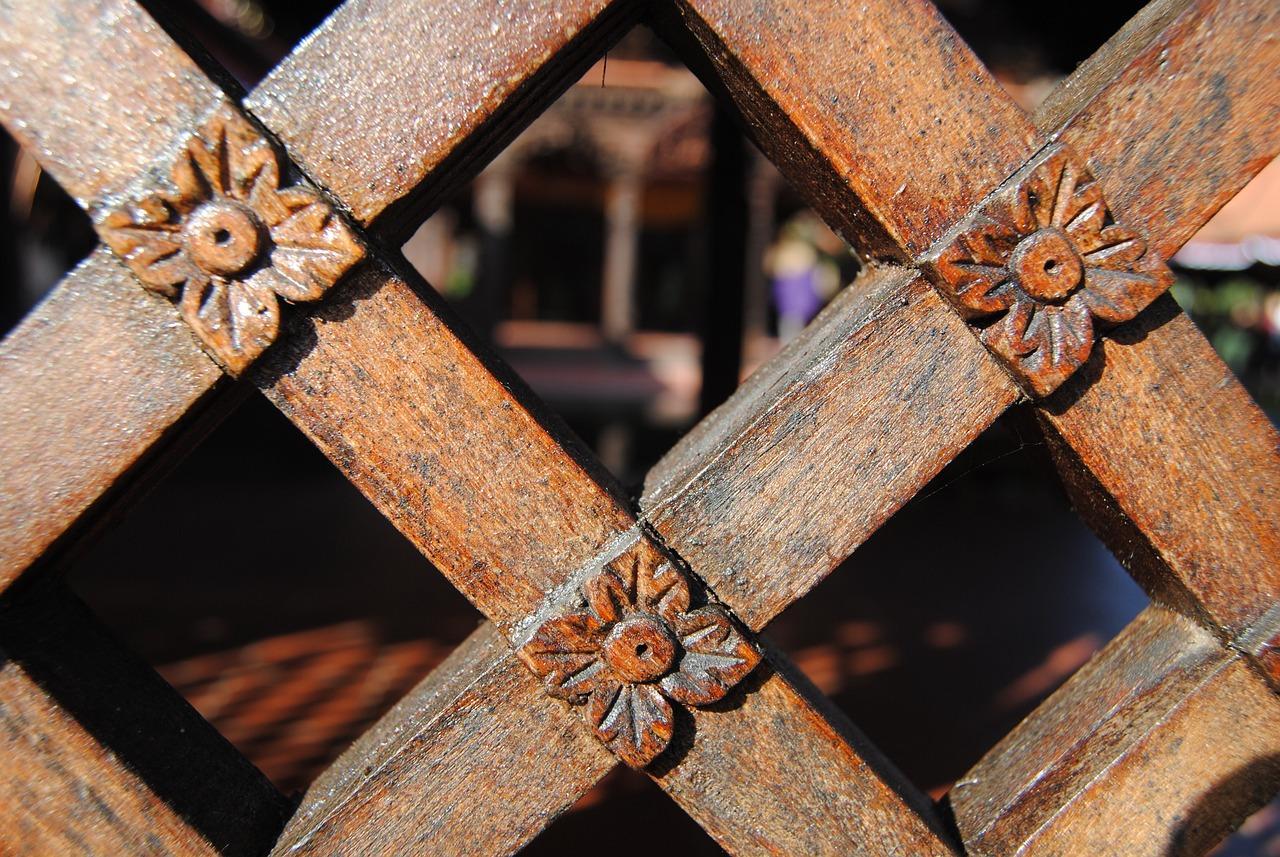
A lattice-like structure is created by intersecting or layering strips or bars of wood, plastic, or metal in a pattern resembling a crisscross or a diamond. Lattice is frequently utilized as a decorative element on the exterior of homes, as an outdoor privacy screen, and in landscaping.
- Why Staining Lattice is Important
It’s crucial to stain lattice to shield it from the environment, such as moisture, UV radiation, and insect damage. The lattice may deteriorate, crack, or lose its color as a result of exposure to various factors over time. The lattice’s appearance can be improved by staining, giving your outdoor area or home exterior a more polished and unified appearance.
- Overview of Different Staining Methods
Lattice can be stained using a variety of techniques, including brushing, spraying, rolling on, and dipping. While the stain is brushed on with a paintbrush, it is sprayed on in an even coat with a spray gun. Using a paint roller to apply the stain is known as rolling-on, and submerging the lattice in a stained container is known as dipping. The best way for you may depend on the type of lattice, your level of skill, and the amount of lattice you need to stain. Each method has benefits and drawbacks of its own.
Preparing for Staining
- Cleaning the Lattice
It’s crucial to clean your lattice completely before staining it. To get rid of any dirt, debris, or loose paint, use a garden hose or power washer. You might need to use bleach or a cleaning solution for stubborn stains or mildew. Before moving on to the following stage, let the lattice entirely dry.
- Sanding the Lattice
After the lattice has dried, any rough edges or splinters can be removed using fine-grit sandpaper. This will guarantee even stain application and a smooth finish. To simplify the task, you can use an electric sander or a sanding block.
- Protecting Surrounding Areas
Lattice staining can be messy, so it’s crucial to shield any nearby places that might be harmed by overspray or drips. To protect neighboring plants, hardscaping, and other surfaces, use drop cloths and painter’s tape. This will make it easier to produce a neat and polished result.
(Read also: A Step-by-Step Guide: How to Assemble Bed Frame and Headboard)
Brushing vs. Spraying
- Pros and Cons of Each Method
Brushing has benefits including the ability to precisely manage the amount of stain applied and the capacity to access confined areas. Longer application times and the potential for brush strokes or uneven application are drawbacks.
Spraying has advantages such as quicker application times and more uniform results. Cons include the possibility of overspray, the requirement for adequate ventilation, and the possibility of uneven application if done improperly.
- How to Brush Lattice
Before brushing the lattice, thoroughly stir your stain and choose a high-quality brush. Long, uniform strokes in the direction of the grain are used to apply the stain using the brush. Make sure to get the stain into all the lattice’s corners and crevices. After the first coat has dried, apply a second coat for a deeper color.
- How to Spray Lattice
Use a top-notch spray gun and give your stain a good swirl before spraying the lattice. Spray the lattice’s corners and edges first, and then move on to the bigger areas. To prevent overspray or uneven application, make sure to maintain the spray gun moving at a smooth, even pace. Before adding a second coat, let the first coat completely dry.
Roll-On Staining
- Pros and Cons of Roll-On Staining
Roll-On: Advantages over brushing or spraying include the ability to swiftly cover a big area, a smooth and even finish, and less mess. Cons include the necessity for numerous coats for a richer color, trouble reaching tight corners or crevices, and the risk of uneven application if done incorrectly.
Here are some pointers on how to successfully roll-on stain your lattice in order to prevent the drawbacks:
- Utilize a high-quality roller: To prevent leaving fibers on the lattice, pick a roller with a tight nap.
- Pour your stain into a paint tray and fill the roller with it to use as a paint tray. To prevent drips and runs, make sure to wipe off any extra stains from the roller.
- Apply the stain: Working your way down the lattice, start at the top and use long, even strokes to apply the stain. Make sure to get the stain into every nook and cranny.
- Apply several coats of stain: For a darker color, use several coats, letting each one dry completely before adding the next.
- Applying the stain with a brush will be easier in spots that are hard to reach with a roller. This will ensure uniform coverage and avoid missed areas.
- How to Roll-On Stain Lattice
- Lattice preparation: Make sure the lattice is dry and clean before applying the stain. To clear away any dirt or debris, use a power washer or garden hose. Scrape off any loose or peeling paint before sanding the area to make it smooth.
- The best exterior stain and roller to use are those with a tight nap and good quality. The recommended nap for lattice is 3/8 inches.
- The stain should be completely mixed with a stir stick. Avoid shaking the can since doing so could cause air bubbles to settle into the stain.
- Pour the stain onto a paint tray, then load the roller with the stain using a brush. To prevent drips and runs, make sure to wipe off any extra stains from the roller.
- Apply the stain: Working your way down the lattice, start at the top and use long, even strokes to apply the stain. Make sure to get the stain into all the lattice’s nooks and crannies.
- Applying the stain with a brush will be easier in spots that are hard to reach with a roller. This will ensure uniform coverage and avoid missed areas.
- Apply several coats of stain: For a darker color, use several coats, letting each one dry completely before adding the next.
- Cleaning: Use mineral spirits or soap and water to clean your instruments and the paint pan. Make sure to properly dispose of any rags or paper towels.
(Read also: How to Install a Storm Door Closer: A Comprehensive Guide)
Dipping Staining
- Pros and Cons of Dipping Staining
Due to the potential for mess and uneven application, dipping staining is not a frequently used technique for staining lattice. Here are some benefits and drawbacks to think about, though:
The advantages over alternative techniques include the ability to completely submerge the lattice for consistent coverage, a quicker application time, and reduced waste.
Cons include the requirement for a sizable container to contain the stain, the challenge of managing immersion depth, the possibility of spilling and splattering, and the requirement for adequate ventilation.
It’s crucial to keep in mind that dipping staining might not be appropriate for lattice that has already been put because it can be challenging to thoroughly submerge it without causing damage to the surrounding region.
- How to Dip Stain Lattice
Due to the potential for mess and uneven application, dipping staining is not a frequently used technique for staining lattice. But if you do decide to dip stain your lattice, here are some fundamental guidelines to remember:
- Pick a sizable container: Choose a container that will fit the lattice completely, such as a sizable plastic tub or a specially-made container.
- Clean up the stain: Pour the stain into the container after fully mixing it.
- Protect the surrounding areas: To prevent stains, cover them with plastic sheeting or drop cloths.
- Carefully insert the lattice into the stain, making sure that it is well covered. The manufacturer’s instructions and the desired color intensity will determine how long the lattice should stay in the stain.
- Remove the lattice by carefully lifting it out of the stain while being mindful not to drop any extra stain onto nearby surfaces.
- Dry the lattice by hanging it or supporting it so that any extra stain can drip off. Before installing it, let the surface completely dry.
It’s crucial to keep in mind that dipping staining might not be appropriate for lattice that has already been put because it can be challenging to thoroughly submerge it without causing damage to the surrounding region.
If basic safety measures, like donning gloves and goggles and ensuring adequate ventilation, are not taken, dipping staining can also be messy and sometimes dangerous. It’s crucial to carefully follow the manufacturer’s recommendations and take the appropriate precautions to prevent staining the nearby surfaces.
Choosing the Best Stain
- Different Types of Stains Available
For lattice staining, a variety of stains are available, each with unique qualities and benefits. Some of the most typical varieties are listed below:
- Stain with a solid hue: This kind of stain offers a consistent, opaque tint that hides the wood’s natural grain. For lattice that has already been painted or stained, it is perfect since it offers excellent coverage and longevity. Additionally resistant to fading, mildew, and moisture is a solid color stain.
- Semi-transparent stain: This kind of stain gives a slight color improvement while allowing some of the wood grain to come through. It works best with a lattice that is in good shape and has a uniform appearance. Additionally offering defense against fading, mildew, and moisture is a semi-transparent stain.
- Clear stain: This kind of stain offers a transparent, all-natural finish that highlights the wood’s original grain. It works well with new or previously stained or painted lattice. Although clear stains are less resilient than solid color or semi-transparent stains, they still offer protection against moisture, mildew, and fading.
- Oil-based stain: This kind of stain soaks into the wood thoroughly and offers enduring defense against moisture, mildew, and fading. Oil-based stains are very simple to use and offer a uniform, smooth finish.
- Water-based stain: This type of stain is simple to remove with soap and water and dries rapidly. Additionally, it has a low VOC (volatile organic compound) content and offers effective defense against fading, mildew, and moisture.
Think about the lattice’s condition, the appearance you want, and the degree of protection you require before selecting a stain. When applying the stain, be sure to carefully read the manufacturer’s instructions and exercise all necessary caution.
- Which Stains Work Best for Lattice
Certain stains work better on lattice than others when it comes to staining. It’s crucial to pick a premium stain that is made especially for outside usage and to carefully follow the manufacturer’s directions while applying the stain.
The following broad recommendations will help you select the ideal stain for your lattice:
- Think about the lattice’s state: If the lattice is fresh or in good shape, a semi-transparent or clear stain would be the best option. These stains offer defense against moisture, mildew, and fading while allowing the natural wood grain to show through. A solid color stain could be required to provide appropriate covering if the lattice is older or has already been painted or stained.
- Consider the degree of defense required: If your lattice is subjected to severe weather or a lot of moisture, a solid color or oil-based stain might offer the best defense. These stains offer durable defense against moisture, mildew, and fading by penetrating the wood deeply. A water-based or clear stain may be ample protection if your lattice is in a relatively protected place.
- Think about the intended look: If you want to preserve the lattice’s original wood grain, a semi-transparent or clear stain would be the best option. While offering some weather resistance, these stains accentuate the wood’s inherent beauty. The greatest option would be a solid color stain if you like an appearance that is more uniform.
- How to Apply the Stain
It takes some planning and attention to detail to apply stain on a lattice. Following are some general guidelines for applying stain:
- Lattice cleaning is essential before applying stain in order to get rid of any dirt, debris, or mildew. After cleaning the lattice with a pressure washer or stiff-bristled brush, let it completely dry before continuing.
- Use sandpaper or a sanding block to smooth away any rough edges or splinters after the lattice has dried. Additionally, sanding enhances the stain’s durability and protection by allowing it to penetrate deeper into the wood.
- Use masking tape and plastic sheeting to cover any nearby surfaces, such as walls, decks, or plants, to prevent stains from spreading.
- Apply the stain: Rolling, brushing, and spraying are a few different ways to apply stain to a lattice. Select the technique that works best for your particular lattice and pay close attention to the manufacturer’s instructions. Working in tiny portions, evenly apply the stain to prevent drips and uneven application.
- In accordance with the manufacturer’s recommendations, let the stain dry completely after applying it. To prevent smearing or harming the finish, wait until the lattice is dry before walking on it or touching it.
- Apply a second coat (optional): You might need to apply a second layer of stain, depending on the kind of stain and the desired amount of coverage. Before using or touching the lattice, carefully follow the manufacturer’s directions and permit the second coat to completely dry.
(Read also: Gas or Electric? Choosing the Right Thermostat for Your Home)
Maintenance
- How to Maintain Your Stained Lattice
An essential step in guaranteeing the longevity and look of your stained lattice is regular maintenance. Here are some general pointers for keeping your stained lattice in good shape:
- Regular cleaning can help avoid the accumulation of dirt, debris, and mildew on your lattice. To clean the lattice, use a soft-bristled brush, a power washer, and, if necessary, a mild detergent. Avoid using abrasives or harsh chemicals that can ruin the stain.
- Check for damage: Regularly look for any signs of damage, such as cracks, splits, or peeling, on your stained lattice. Any problems should be resolved right away to stop further deterioration or damage.
- Touch up as necessary: Your stained lattice may fade or sustain damage in some places over time. It is possible to improve the appearance and add more protection by touching up the stain. When applying touch-up stain, carefully adhere to the manufacturer’s instructions.
- Seal the stain: By adding additional protection against moisture, UV rays, and other environmental elements, applying a sealer or topcoat can help your stained lattice last longer. When using a sealer or topcoat, carefully adhere to the manufacturer’s instructions.
- Prevent harsh weather: Prevent subjecting your stained lattice to harsh weather elements like intense heat or cold, lots of moisture, or direct sunlight. To shield your lattice from direct sunlight, think about putting it in a shade or an awning.
- How Often to Re-stain
The kind of stain you used, the temperature where you live, and the amount of exposure to sunlight and moisture will all affect how often you need to re-stain your lattice. For general instructions on re-staining your lattice, see below:
- Verify the directions provided by the manufacturer: How frequently to re-stain your lattice may be suggested by the manufacturer’s recommendations for your particular stain. To ensure the greatest outcomes, closely adhere to following directions.
- Examine your stained lattice periodically for wear indicators, such as fading, cracking, or peeling. Restaining your lattice might be necessary if you observe any of these problems.
- You might need to re-stain your lattice more frequently if you live in a region with harsh weather, such as high amounts of dampness or extreme temperatures.
- Depending on the extent of exposure, a lattice that is exposed to direct sunlight or dampness may need to be re-stained more frequently than a lattice that is shielded or covered.
- Depending on the aforementioned conditions, you might need to re-stain your lattice every two to three years as a general rule. It’s crucial to remember to regularly restain your lattice because doing so can keep it looking good and shield it from harm.
(Read also: How to Create a Stunning Lawn with the Right Grass)
Conclusion
Lattice staining is a crucial home upkeep chore that may help shield your lattice from the weather and improve the overall look of your property. You may have a long-lasting and lovely finish that increases the value and curb appeal of your property by taking the time to properly prepare your lattice, choose the suitable stain and application process, and maintain your stained lattice over time.
Remember to carefully follow the manufacturer’s recommendations and take action to safeguard and maintain your stained lattice throughout time, whether you decide to roll, brush, or dip your lattice. By keeping these suggestions in mind, you can create a gorgeous and durable finish that will improve the appeal and market value of your property for many years to come.


