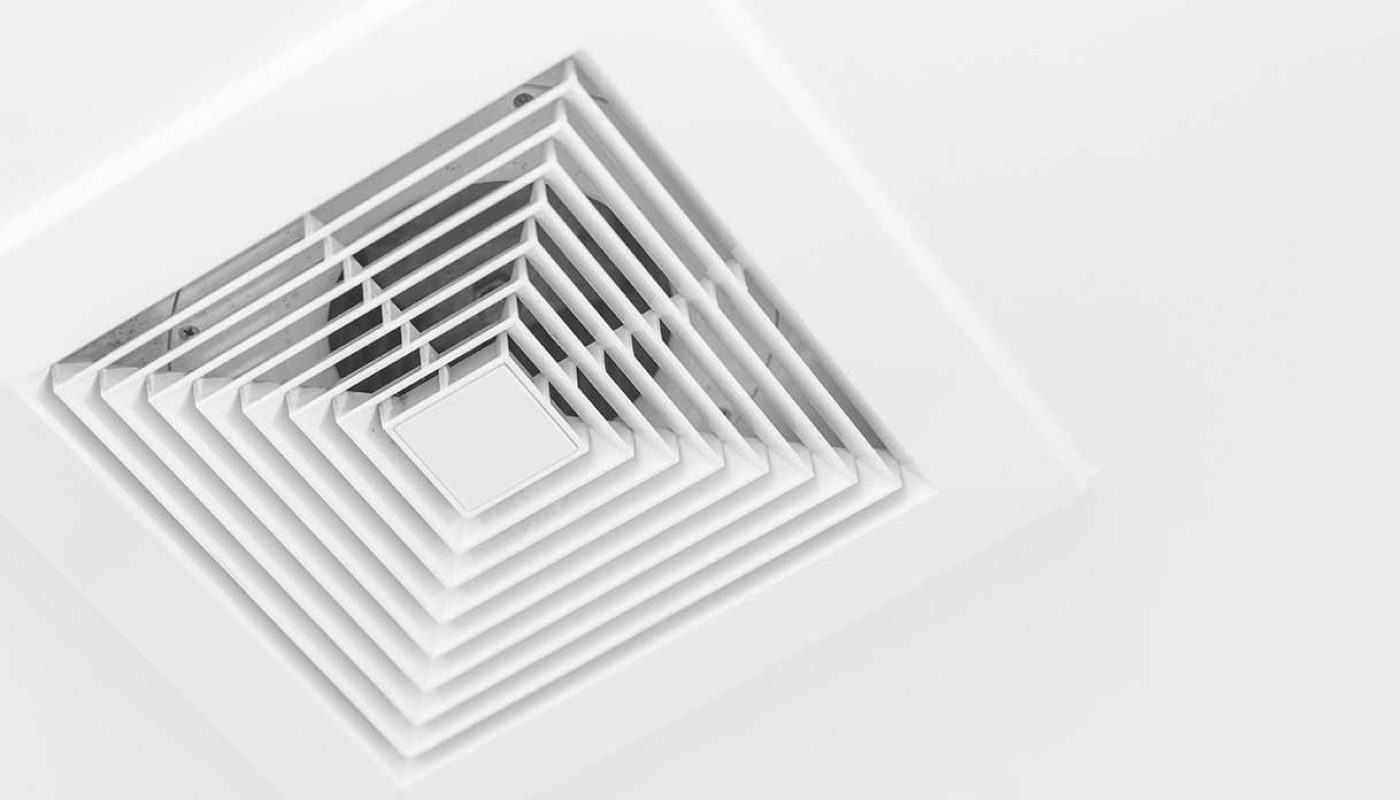
For people who don’t have windows to ventilate their bathroom, a fan has a very important role to keep the bathroom stays dry and less damp that might cause bad odor, roaches, mildew, mold, and other stuff. If you’re familiar with it and have been using a fan for years, it might be the time you’re finally facing the crisis where it’s not working properly anymore and need replacement. Of course, just like other work chores, replacing a bathroom fan can be done by yourself.
(We would also recommend this: 9 Easy Steps on How to Change Sand in Pool Filter All by Yourself Quickly)
On this page, we will let you know that replacing a bathroom fan is not hard to do by yourself.
HOW TO REPLACE A BATHROOM FAN
To ensure a smooth process, gather some supplies and tools that you will need for this job. Those are:
- Protective gears (eyewear, gloves, etc)
- Drop cloth
- Screwdriver
- Circuit tester (aka voltage detector — the non-contact variety will be easiest to use)
- Drill and bits
- Drywall knife
- HVAC tape
- Wire connectors
CHECK FOR PERMISSION

First of all, check to your local city or county government and ask if you’re allowed to do home electrical work by yourself. Some areas might have a particular rule that has to be done by a professional when it comes to electricity stuff and you don’t want to cross that line.
(We would also recommend this: How to Level Ground for Pool with Only 6 Steps | Fun DIY Project)
ENSURE THE FAN’S TYPE
Before replacing the fan, please double-check your current fan so you know how the wiring works and get the correct fan with the same type.
- Many bathroom fans are hard-wired through the ceiling or attic.
- Some have a standard electrical plug that feeds into a regular outlet.
- If you aren’t sure which kind you have, pop off the fan’s cover and inspect how it is powered.
TURN OFF THE ELECTRICITY
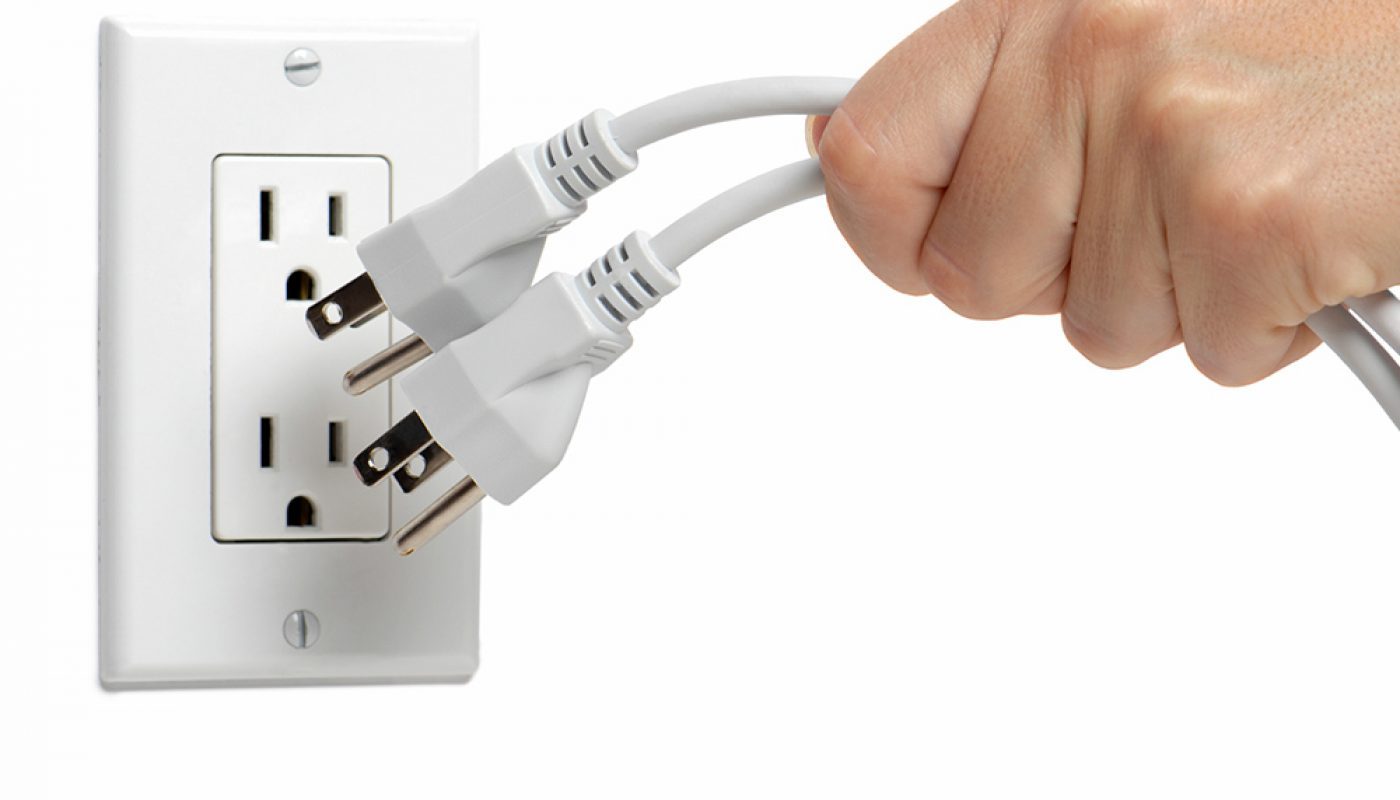
Before turning off the power, since you will work with ceilings, dirt and debris are something that you can’t avoid.
- Lay down the drop cloth on the floor and other areas that need to be protected like the sink, counter, and others.
- Head to your circuit breaker and turn off the electricity that is connected to the bathroom fan.
REMOVE THE OLD FAN
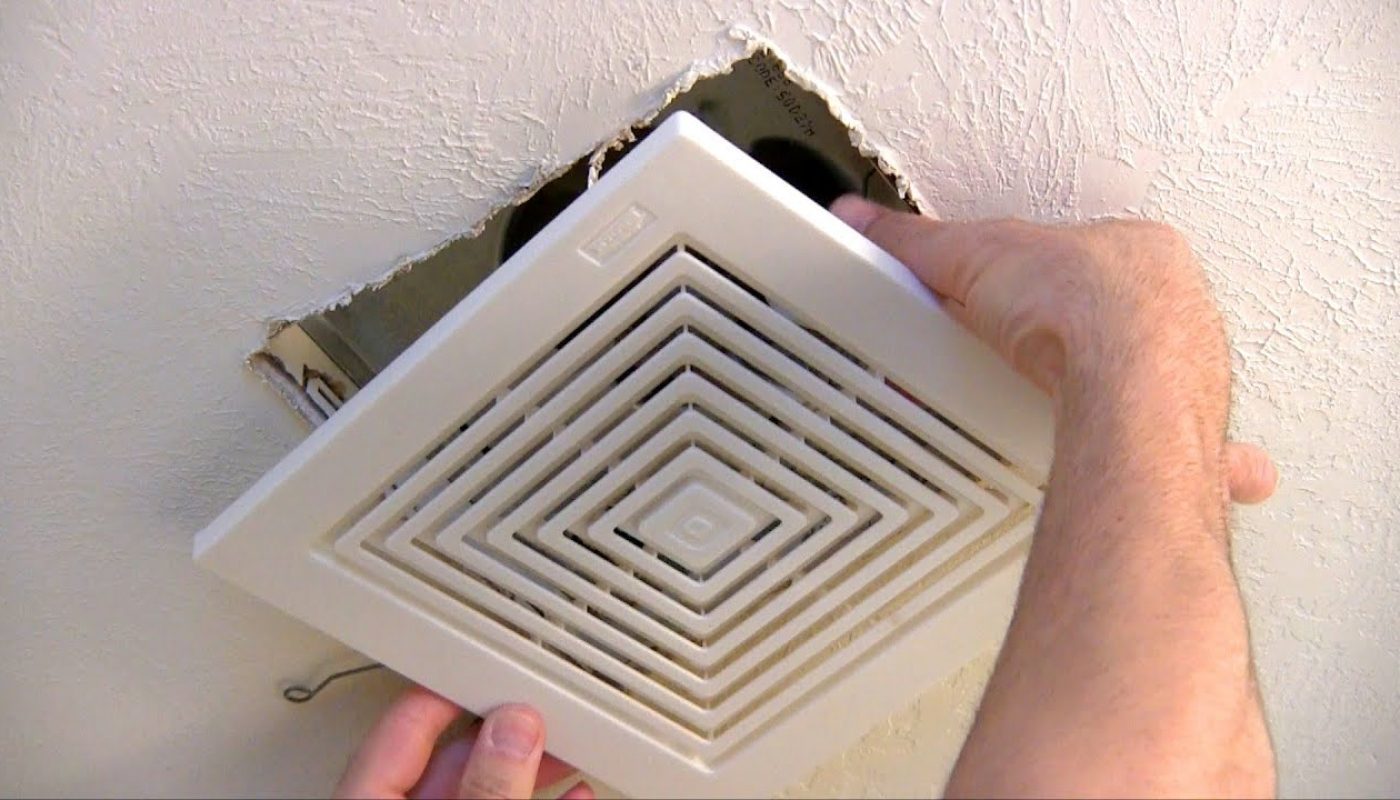
- Using a screwdriver, take off the fan’s cover by removing the screws that hold it.
- If you don’t see screws, the cover probably just snaps in place so you can push to pop the cover off.
(We would also recommend this: How to Raise Cyanuric Acid in Pool with 3 Simple Steps Safely)
DISCONNECT THE WIRING AND VENT PIPE
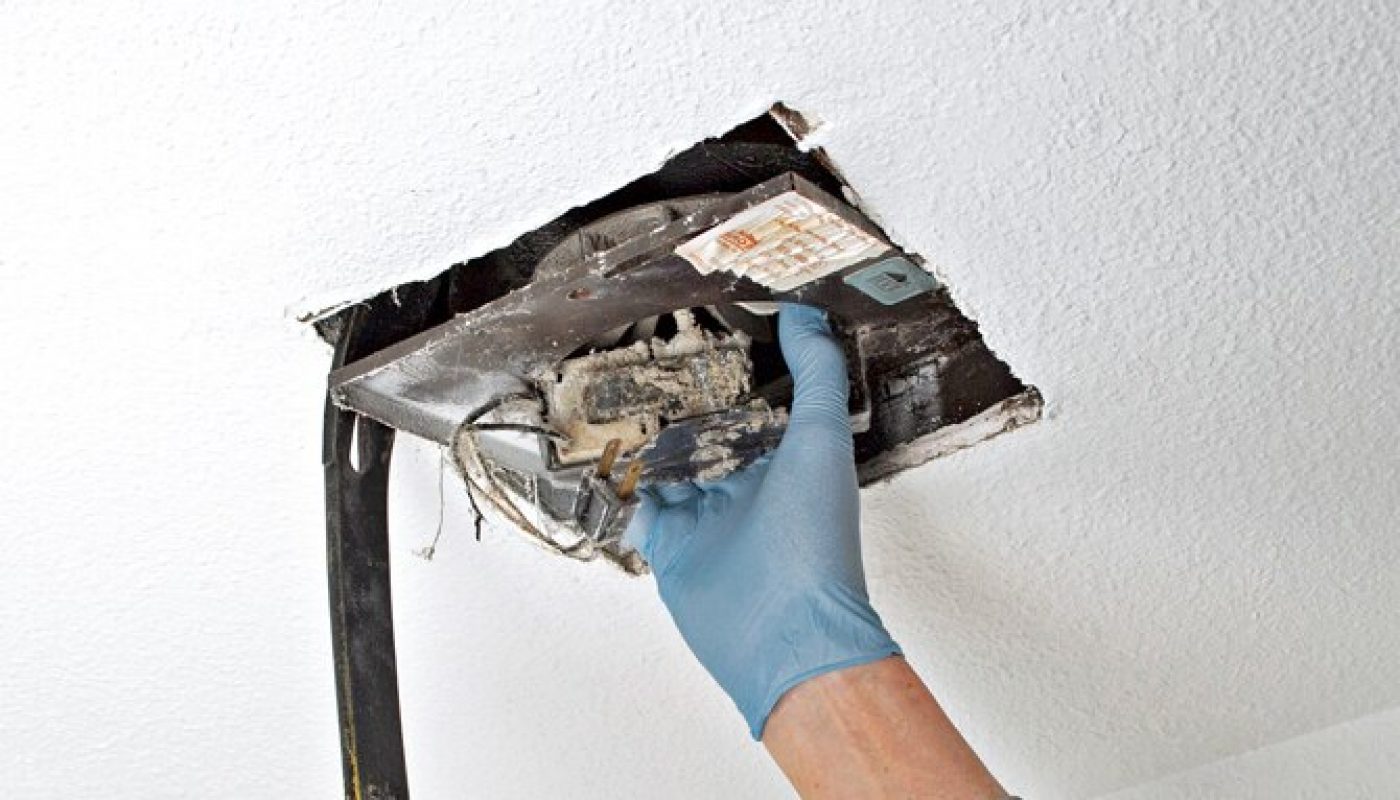
- Double-check the power’s off by turning on the voltage detector and setting it near the wires. If everything checks out, you can remove the wires from the housing.
- If you see wires leading from the ceiling to plastic connectors, remove the plastic connector to separate the wires from the connectors to the housing.
- If you see the wires, but not the plastic connectors, unscrew the junction box cover on the fan’s housing, and you should find them inside.
- Detach the flexible vent pipe from the old fan’s housing.
- The vent pipe may be attached to the housing with HVAC tape. If so, peel this away.
- Once the tape and/or clips are removed, gently tug at the vent pipe until it is removed from the fan housing.
REMOVE THE FAN HOUSING
- Look for the mounting screws that hold the fan housing in place. For some models, these will be on the bottom, and you’ll be able to access them from the ceiling. For others, you’ll have to climb into your attic and remove the screws from above.
- Lay down a piece of plywood across joists in your attic so you’ll have a surface to kneel on.
- You might need someone to help to hold the housing while you remove the screws.
- Once the screws are removed, pull the old fan housing out of the ceiling.
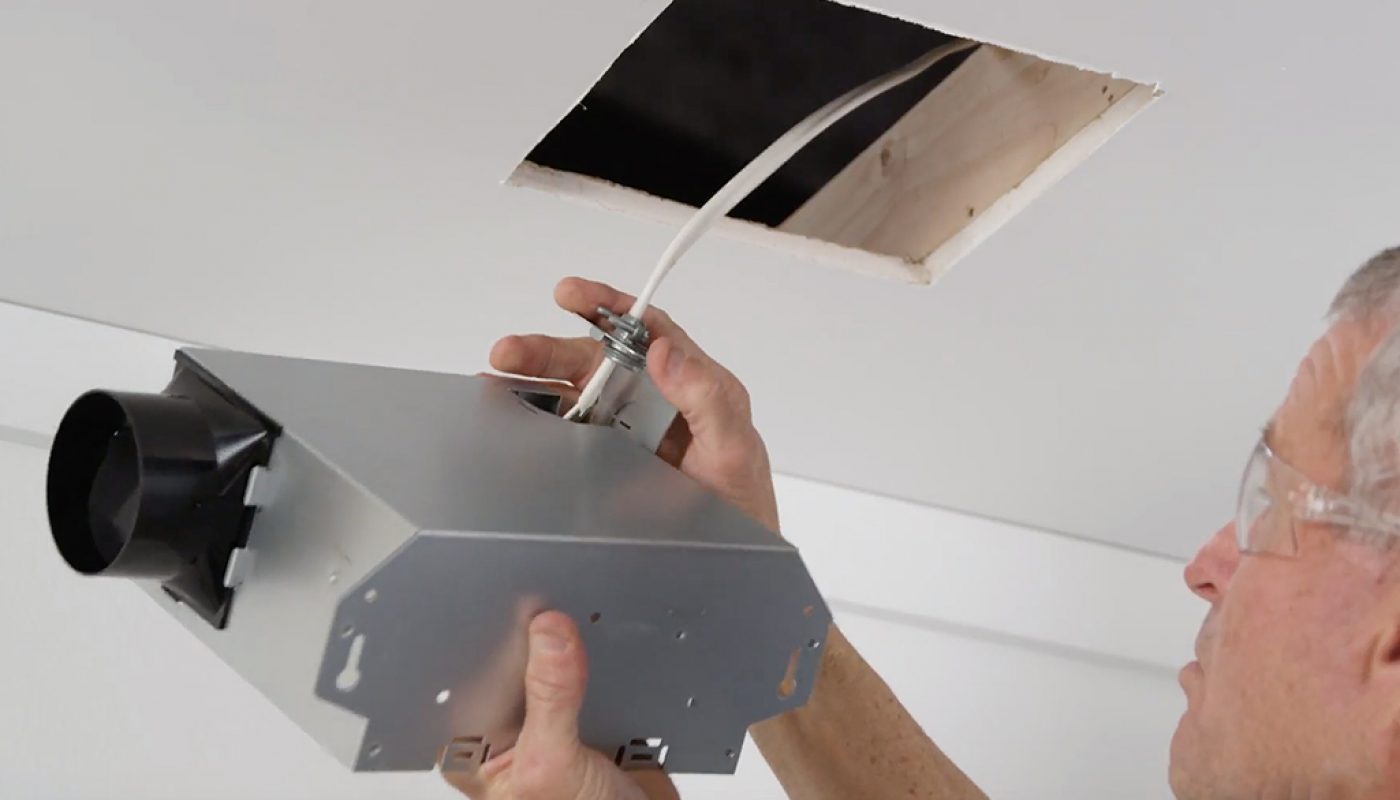
INSTALL THE NEW HOUSING
Always read the instructions to make sure if the housing bracket can be installed from the bottom or inside the attic. If the bracket needs to be attached from the attic, the steps are:
- Go into your attic and lay down a piece of plywood across ceiling joists so you have a surface to work on.
- Have someone help you by holding up the fan housing from below.
- Brackets will be attached to the fan housing.
- Drive screws through the bracket’s holes into the ceiling joists until the housing is securely in place.
(We would also recommend this: 4 Quick Steps on How to Remove Chain Link Fence Safely All by Yourself)
CONNECT THE WIRES
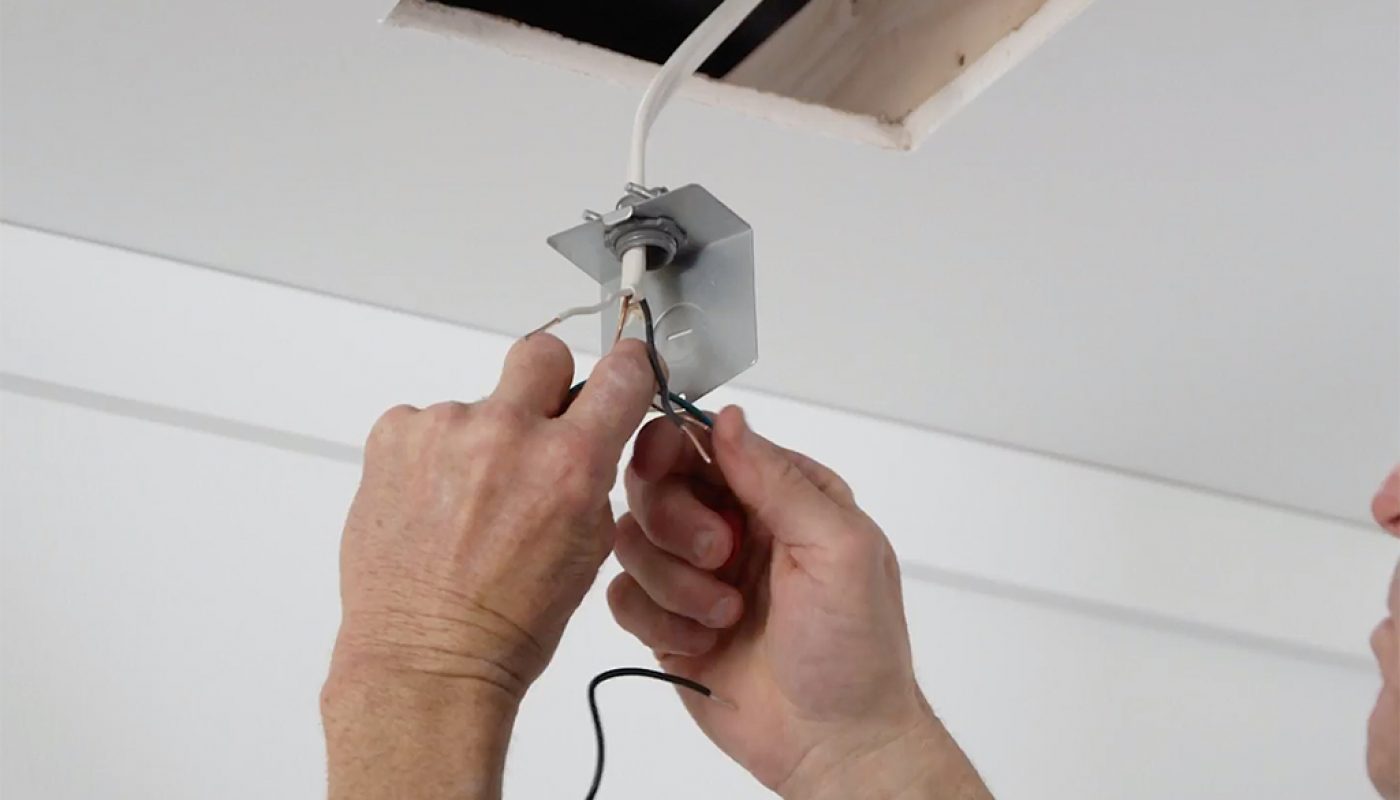
- Attach the wires in the fan housing to the corresponding colored wires in the ceiling or attic that ran to the old fan housing (white to white, black to back, yellow to yellow, etc.).
- Place the wires together and use plastic connectors to join them.
- Push the wire connections back into the housing and replace the junction box cover when you’re done.
- If the fan has a standard plug instead of bare wires, just plug it into the outlet in your attic.
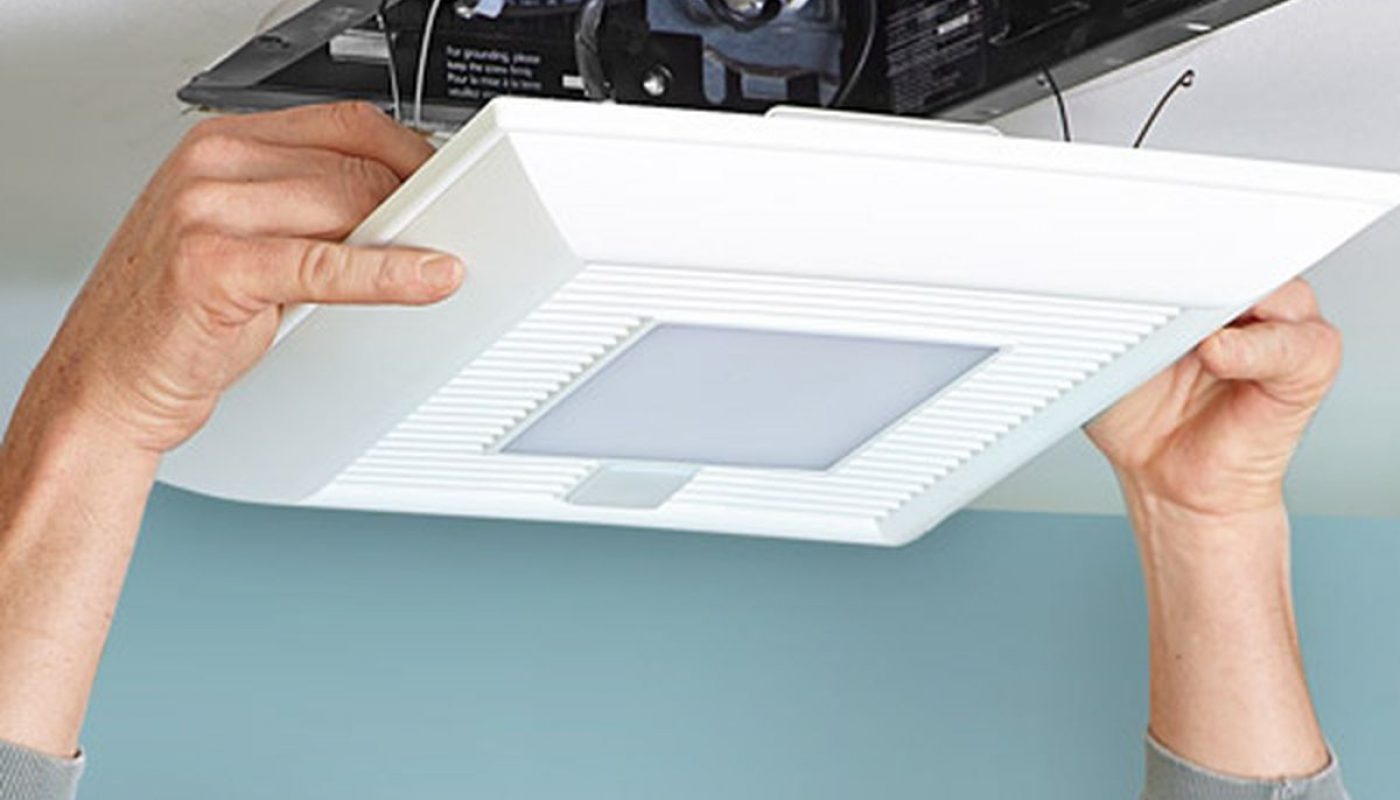
CLOSE THE COVER AND TEST
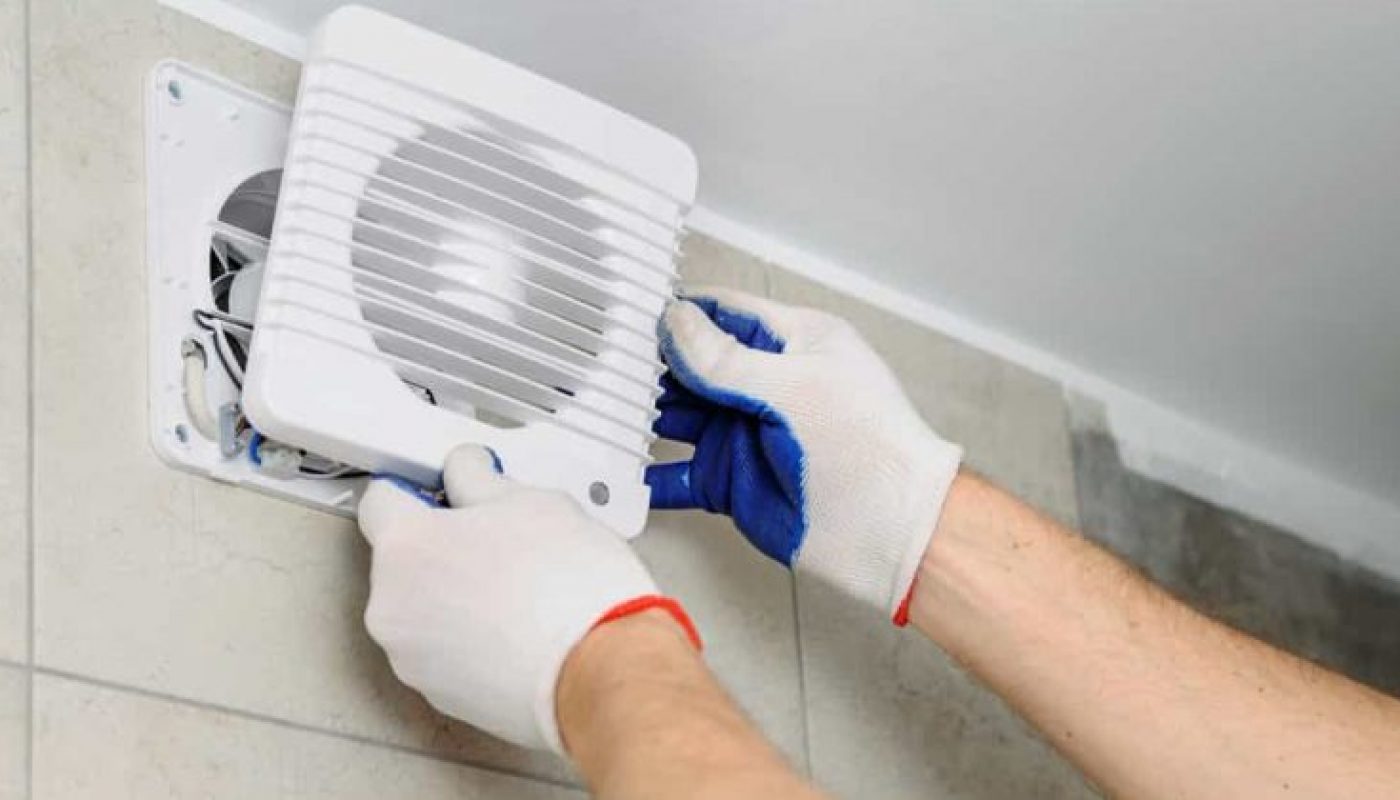
- If the new fan’s cover is held on by plastic tabs, just push it into position from below until it clicks into place.
- If your fan’s cover is held in place by screws, drive these in from below with a screwdriver or drill.
- Turn on the fans switch to test that everything sounds right and works well.
- If there are loud or unexpected noises, or if the fan doesn’t run at all, cut the power again and check over your work to make sure you installed the fan correctly.
- Alternatively, contact a contractor or electrician to inspect your work.
(We would also recommend this: How to Take Care of Your Yard: 14 Useful Lawn Mowing Tips)
Those are nine steps that you can try by yourself if you’re going to replace your current bathroom fan. Although this process can be done by yourself, please don’t hesitate to contact your nearest professional to help you with more detailed work.