When it comes to a bathroom, we can’t deny that it’s one of the core rooms in a house that has to exist. Either it’s the master or guest bathrooms, it’s still an important area that you have to take into account when designing it. Well, it’s not only the design but also its maintenance to keep everything clean and free from any debris and buildup. We know that bathrooms have some complimentary stuff to support the function and of them is a sink.
(We would also recommend this: How to Level Ground for Pool with Only 6 Steps | Fun DIY Project)
There are a few reasons why homeowners choose to change or replace their current sink such as for a remodeling purpose, the current one is not performing well, or just simply want to get a new look. Of course, you can call a professional plumber to do this job but guess what, you can do this process by yourself! Yes, you read it right, even without the pro’s help, you can change your current bathroom sink with your own hands.
If you’re not sure how to replace a bathroom sink, we have an easy tutorial about it that you can consider using as a reference so just keep reading!
HOW TO REPLACE A BATHROOM SINK
Before starting the job, there are some tools and materials that you have to prepare to make sure that the job is smoothly done.
- Protective gears (goggle and gloves)
- Plumber’s tape
- Plumber’s putty
- Tape measure
- Utility knife
- Adjustable wrench
- Pipe wrench
- Screwdriver
- Caulk
- Pry bar
- Soft towel/cloth
- Bucket
(We would also recommend this: How to Clear a Cloudy Pool with Baking Soda with Only 4 Steps)
STEP 1: TAKE MEASUREMENTS
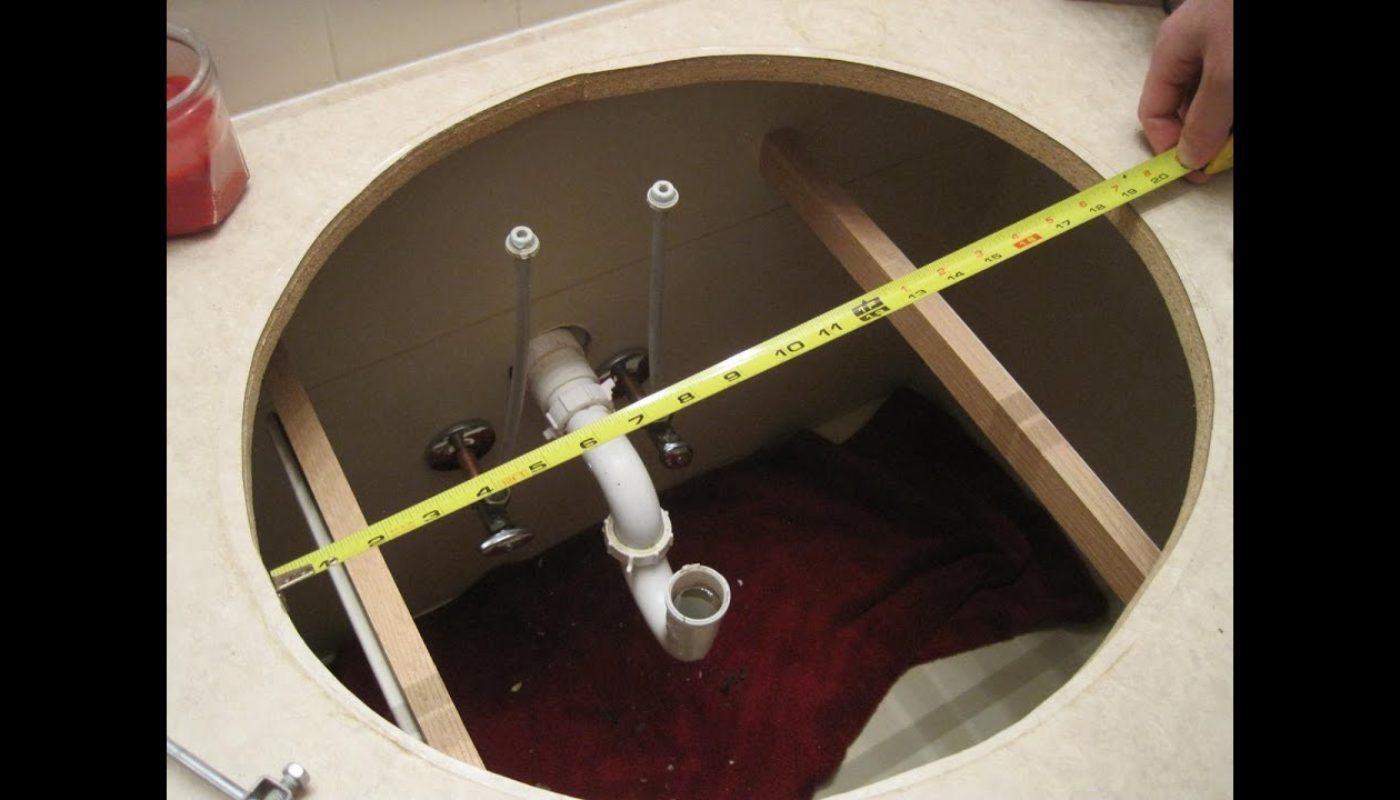
The first step is to take measurements of your new sink to ensure that the size of the sink, countertop, and vanity are matching.
- By using a tape measure, measure the length, width, and depth of the current sink.
- Then, measure the width of the countertop, the distance from the sink’s edge to the countertop’s edge, and the back of the sink to the wall.
- The new sink should be the same size or slightly larger than your current sink.
STEP 2: TURN OFF THE WATER
This one is another obvious step to do to make sure everything is safe and runs smoothly.
- Turn off the water flowing to your bathroom sink from the valves that are usually located directly under the sink.
- Before removing the old sink, turn on the faucets to ensure there is no water flow. Just in case there’s any leak, you may put a bucket underneath the sink.
(We would also recommend this: How to Till a Garden Manually All By Yourself with 4 Quick Steps)
STEP 3: REMOVE THE OLD SINK
The next step removing the trap from the old sink and ready to install the new one.
- These parts are usually located on the pipes directly underneath the sink.
- Then, loosen or break the clips.
- By using a utility knife, cut the seal around the old sink.
- Remove the old sink.
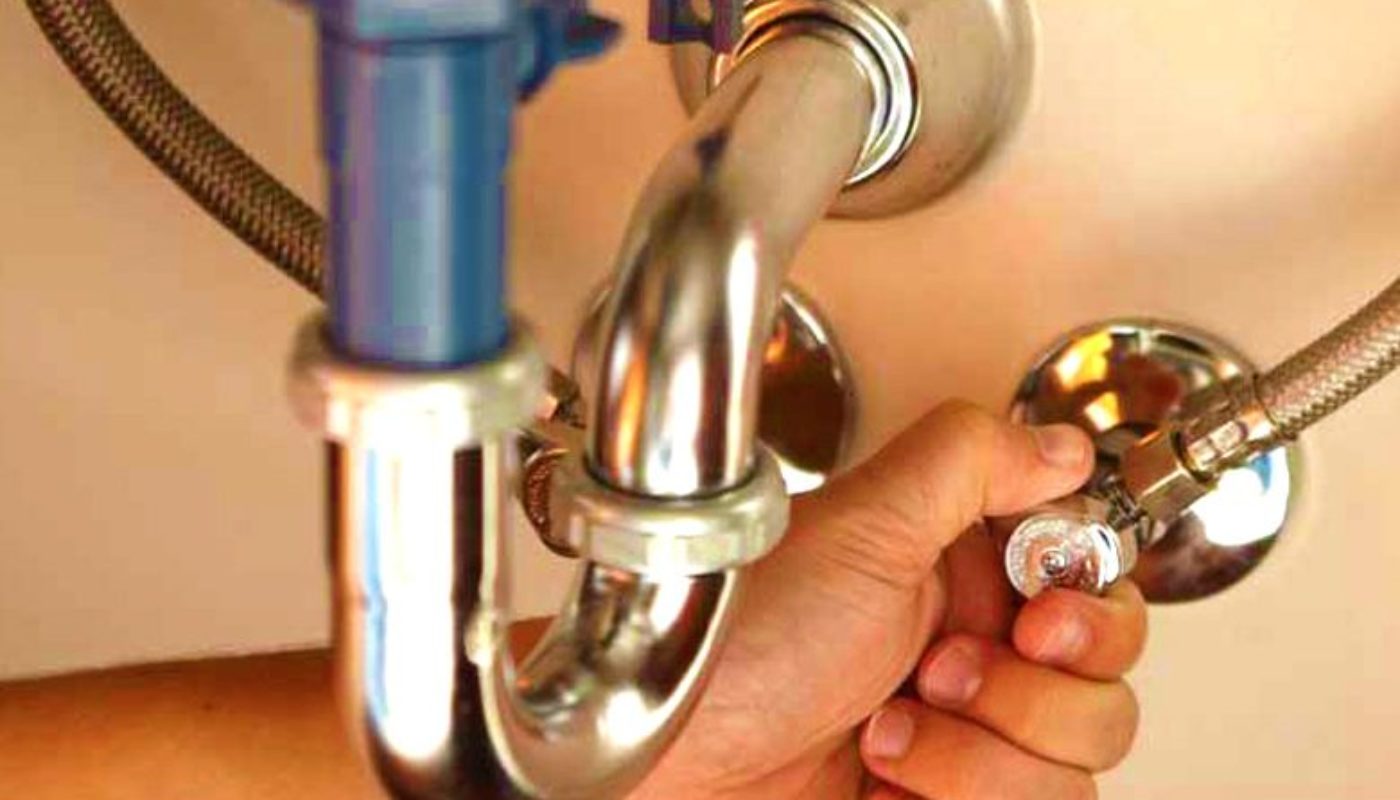
STEP 4: INSTALL THE NEW FAUCET
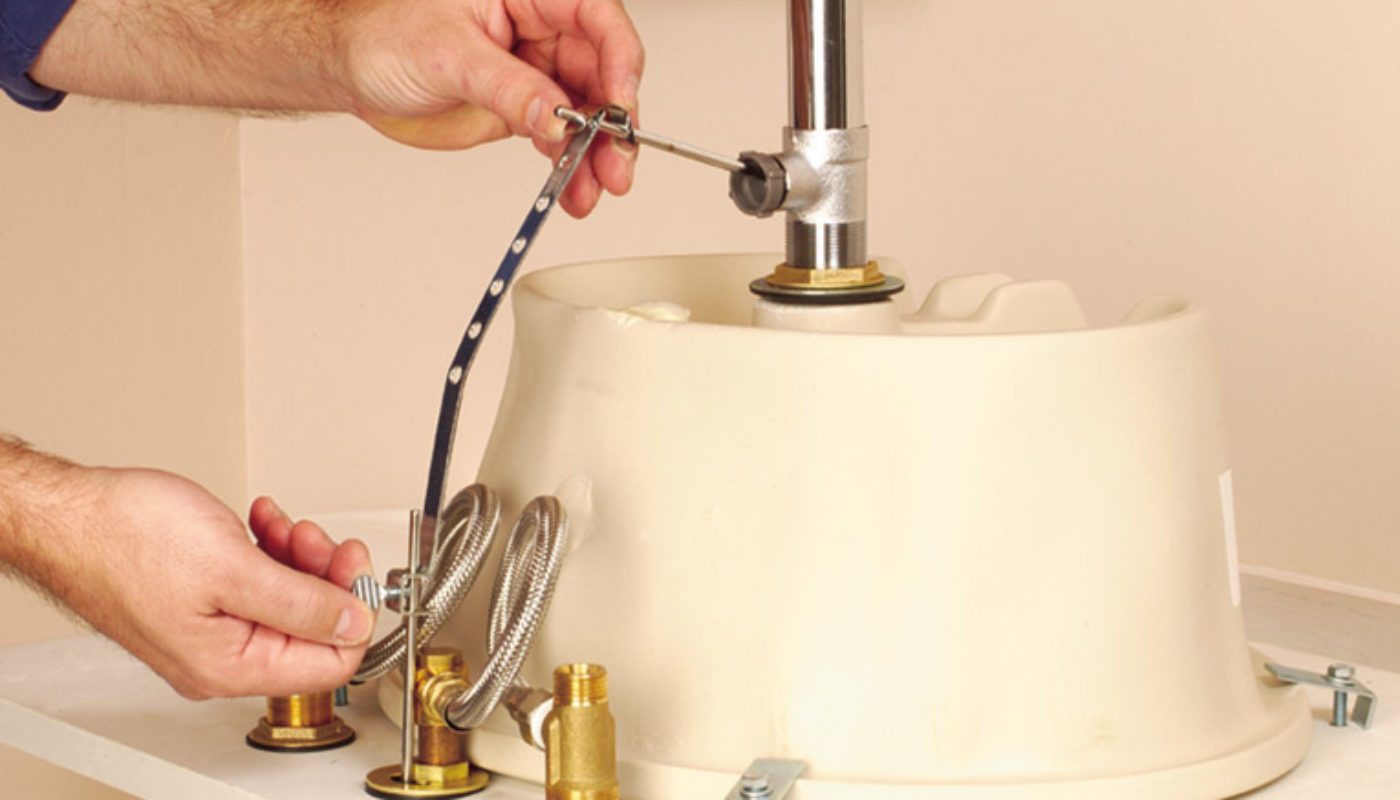
- Please make sure that you read the user’s manual or manufacturer’s instructions carefully to make sure that it’s installed correctly.
- You may want to put down a rope of plumbers putty underneath the sink drain ring.
- Attach the P-trap to the new sink drain line.
- Apply plumbers tape in a clockwise direction before attaching the water valve lines.
STEP 5: CAULK THE NEW SINK
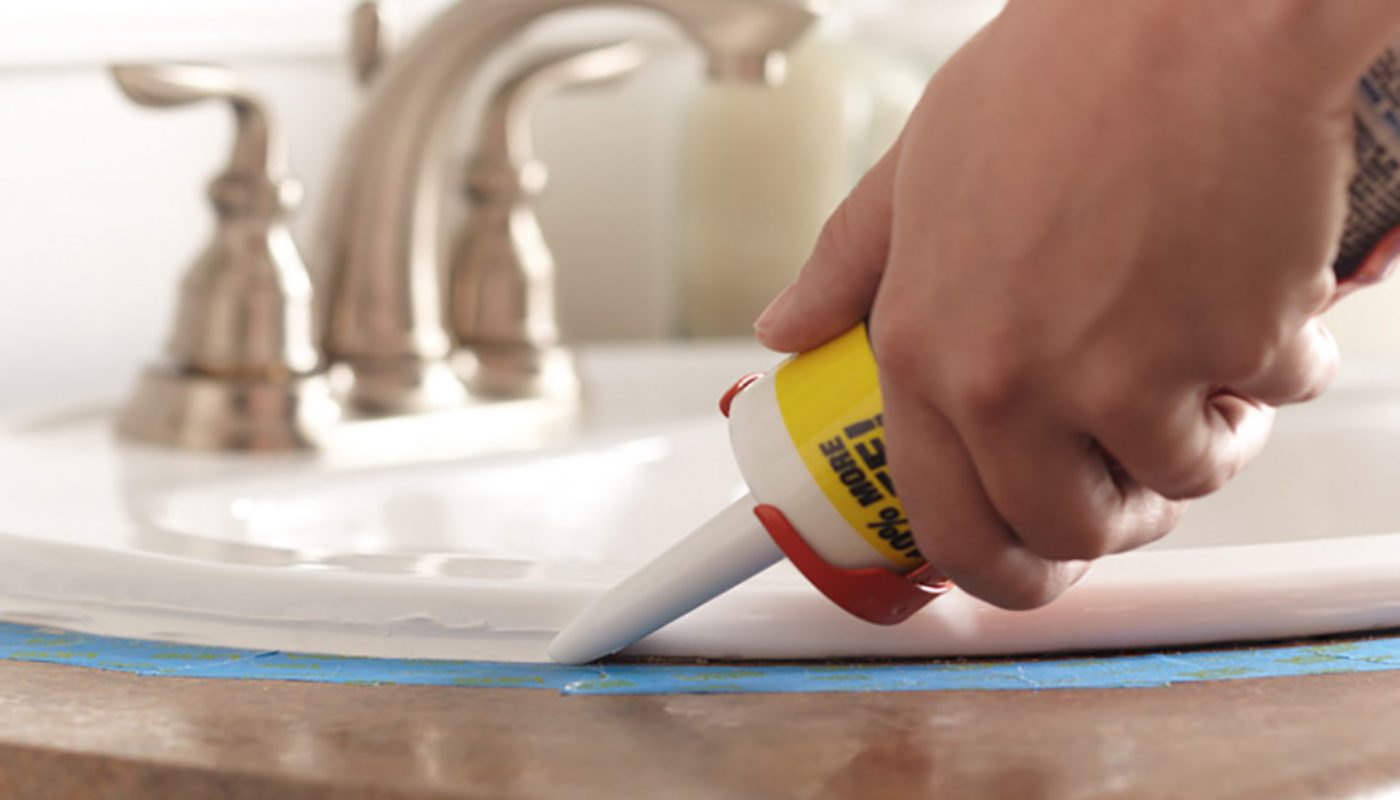
Before using the caulk, please ensure that the brand is safe for your particular counter because if you use the wrong materials, they can ruin granite and other fine materials. The last thing is discoloring the ring around the new sink.
- To caulk it, turn the new sink upside down on the towel and run a ¼-inch of caulk under the rim.
- Put the sink in place and press it down firmly around all edges.
- Wipe off any runoff caulk with soft towels or cloths.
- Re-install the clips.
(We would also recommend this: How to Close a Pool Tutorial with 8 Easy Steps | DIY Pool Maintenance)
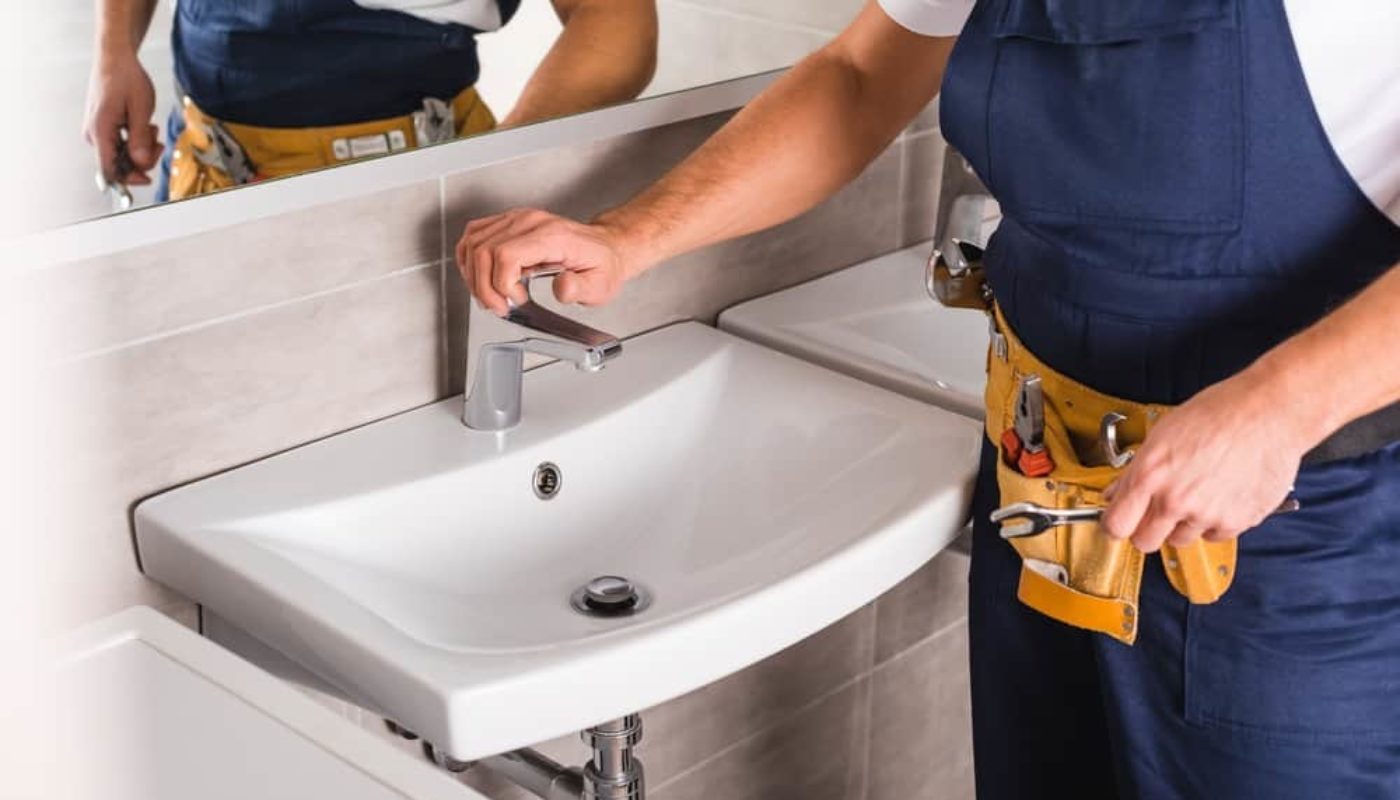
STEP 6: TURN ON THE WATER LINES
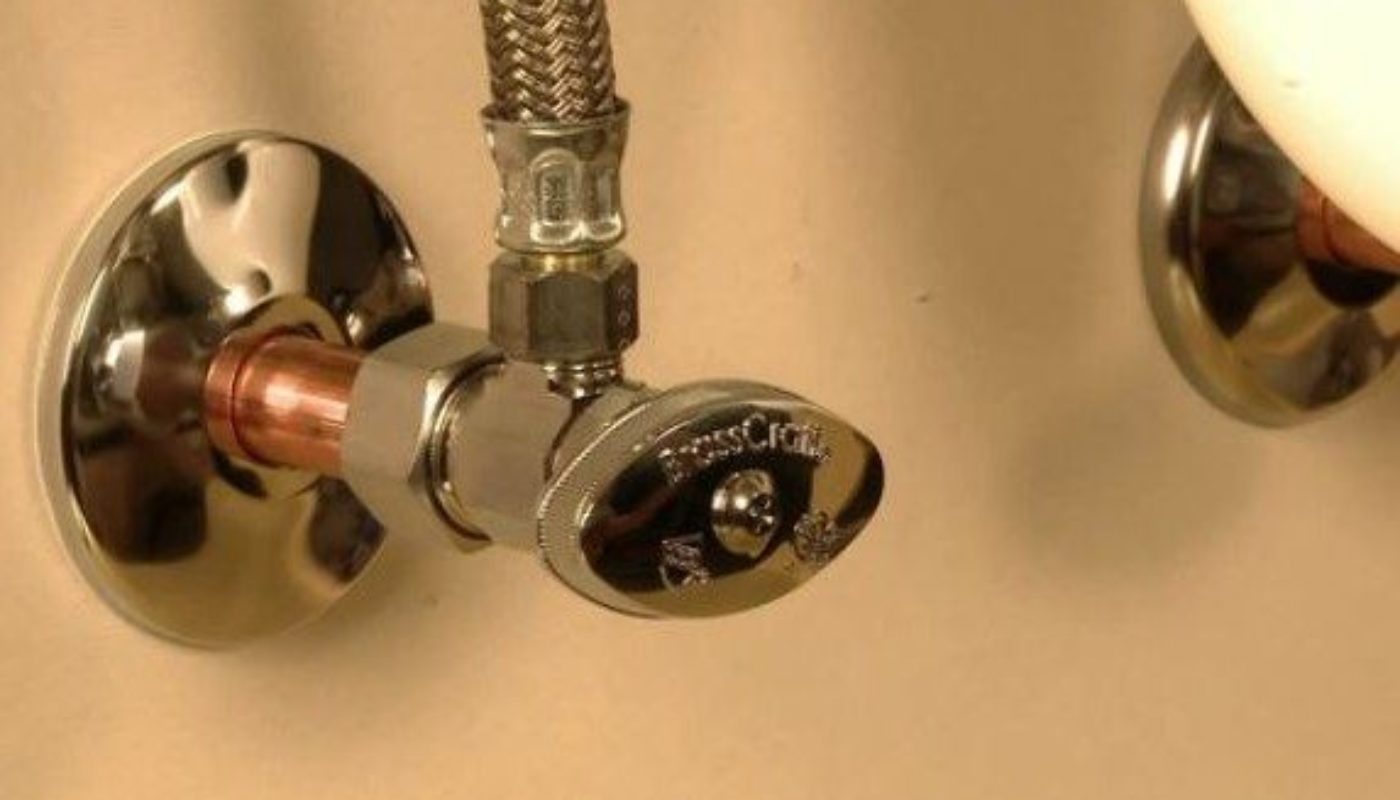
Yes, you’re close to the finish line by doing a double-check of the water lines and plumbing. The steps that you can do are:
- Attach and tighten the faucet connections and the drain assembly.
- Connect the supply lines to the faucet’s tailpieces.
- Connect the stopper, the tailpiece, and the trap.
- Ensure all connections are secure.
- Flush the toilet to remove any dirt or air from the water lines before turning the water back on.
STEP 7: DOUBLE-CHECK FOR LEAKS
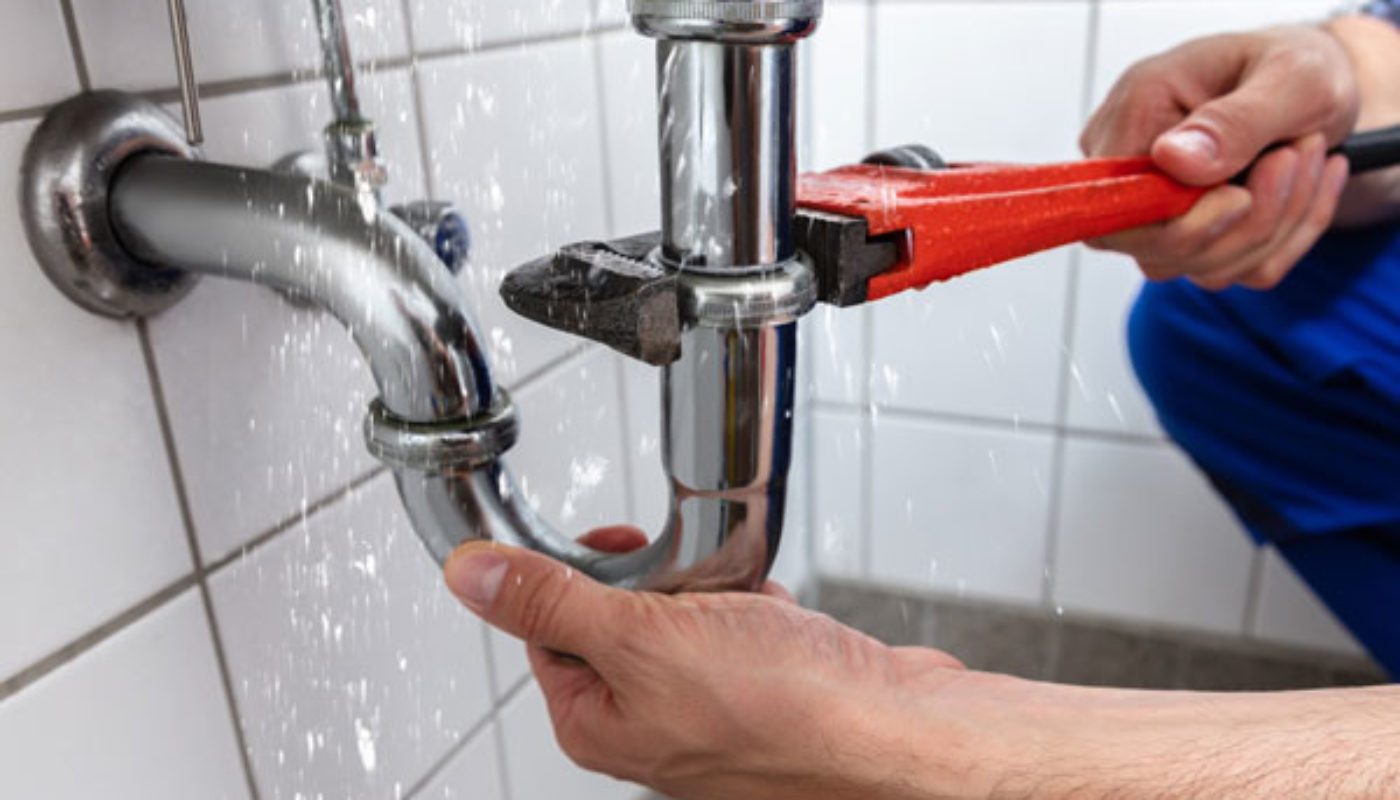
Here you are on the last stage of the process and to ensure that everything works properly, you can use these pointers as a reference to check if there’s any leak from the pipe or plumb system
- Turn the water valves back on and look for any leaks around the sink or under the pipes.
- If you see leaks, carefully tighten the slip nuts until the dripping stops.
- Repeat this step to make sure that there’s no more leak.
(We would also recommend this: How to Remove Fence Post That is Rotten All by Yourself with Only 3 Steps)
So, those are seven quick steps on how to replace a bathroom that you can do by yourself, especially if you love DIY projects. Every homeowner will have that time when they need to replace their bathroom sinks whatever the reason is. No matter of material or surface that your sink and vanity have, you have to make sure that you handle everything with extra care because it may lead to scratch.
Doing a DIY project is indeed fun because you can explore something new, especially if you love trying a new experience. However, if you’re afraid or not sure about the whole steps, you may want to call your trusted plumber and make sure that everything is correct and installed accordingly. Now, let’s take a look at your bathroom sink, and just in case you need to replace it, you can follow these steps, and make yourself a pro fixer!