One of the interesting things, when we are talking about the Halloween decor, is adding some witches-themed stuff. It will create a much spookier and scarierA�look to your property during the Halloween week.
It’s not only about the Jack O’ Lantern, bats, or white ghosts but adding some witches hats or brooms will be a nice complement to your Halloween decor. There are hundreds of inspiring witches-themed decoration that you can try at home.
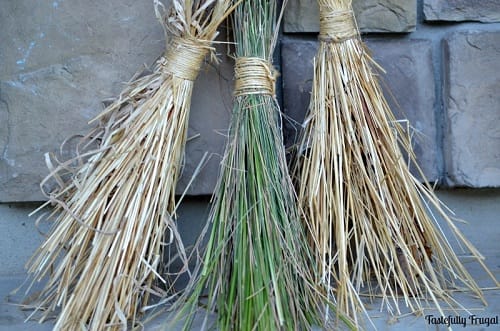
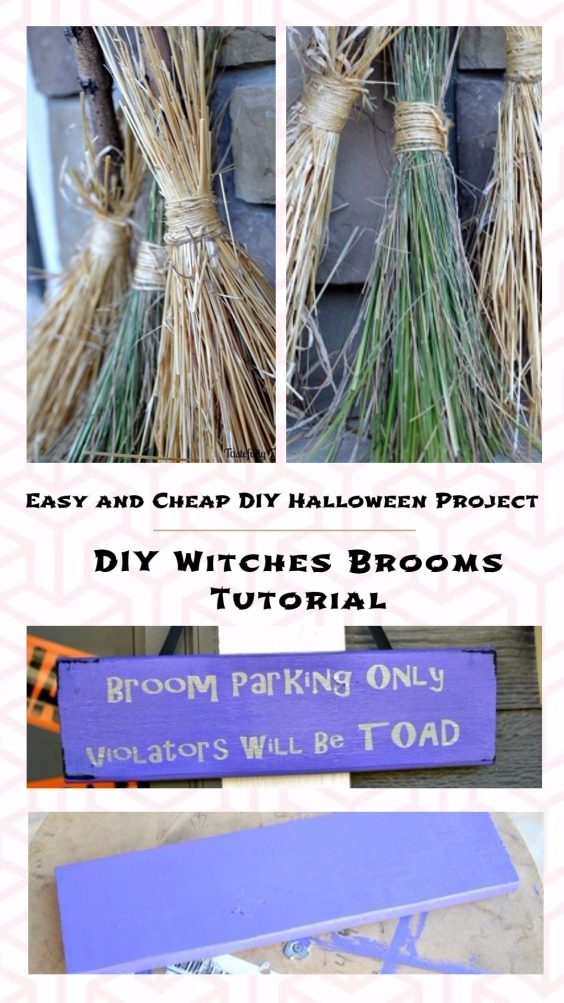
The witch’s broom is surely a signature thing that you can’t miss for your Halloween decor, and the good news is you can make it by yourself without any need of huge efforts and lots of bucks. You can even recycle some ‘garbages’ around your house to make a spooky witch’s broom.
Here, the DIY Witches Brooms that are originally created by Sydney from tastefullyfrugal.org. It will become an adorable Halloween decor to put on your porch.
This broom is very easy to make and use very easily available materials that you can get around your yard. It’s kind of go green stuff that uses the elements of nature. So let’s just keep reading to find out the complete tutorial below.
(Check this out:A�DIY Hanging Witch Hats Tutorial)
DIY Witches Brooms Tutorial
Things that you’ll need to prepare:A�
- Twine
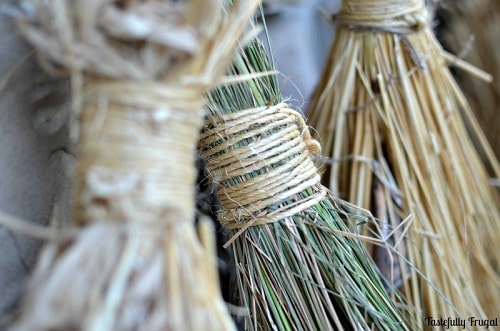
- Dead tree branches (find the ones that look properly for the brooms stick’s size)
- Dead weeds
- Tall grass
Steps that you’ll need to do:A�
- If you find some moss on the branches’ surface, clean it up first to avoid the irritation. Keep the natural spots of the branches to make it look rustic.
- Grab some dead weeds and tall grass, you can either mix two of them in a single broom or apply the different materials for each broom.
- Attach the grass and weeds to the branches, and secure them by using the twine. You may need some help to keep them attached to the branch while tying the twine at the same time.
- Make sure to make a strong whip knot to keep the grass and weeds stay in place.
- Bingo! Now you are ready to put your broom on your porch!

To make it look even way more attractive, you can complete the witches’ brooms with a broom parking sign that is also totally easy to make, and below we share you the tutorial.
(Read also:A�DIY BW Pumpkin Topiary Tutorial)
DIY Witches Broom Parking Sign Tutorial

Things that you’ll need to prepare:A�
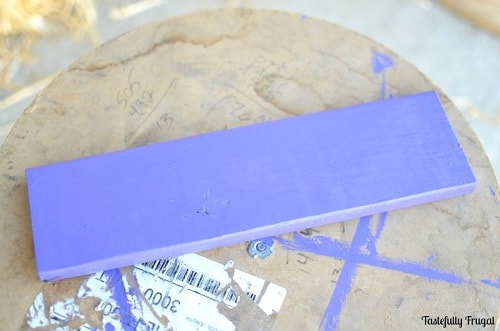
- 1″ x 4″ piece of wood
- Gloss acrylic paint in any color as you wish.
- Black matte acrylic paint.
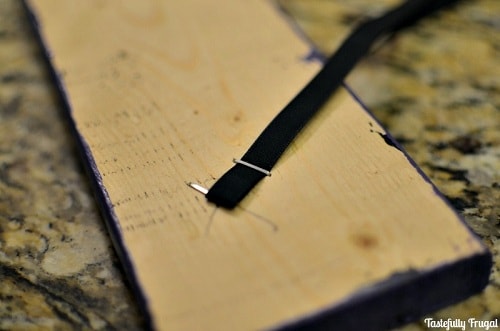
- Silver vinyl
- Ribbon
- Paintbrush
- Staple gun and staples
Steps that you’ll need to do:A�
- Cut the wood into about 12″ long or as your preference.
- Paint the side of the wood with the acrylic paint in any color you choose, and give a little bit of rustic accent by painting its corners with the black paint, let it dry for about an hour.
- While waiting for the wood to dry, cut the silver vinyl into the saying that you want, here the ‘Broom Parking Only Violators Will Be Toad’ is used.
- Cut the ribbon, and staple it to the back of the ribbon for the hanger. Make sure you staple the ribbon securely.
- Now hang the sign next to the broom!
So those are the tutorial of DIY witches brooms and broom parking sign that you can try at home. You’re ready now to have some adorable decoration for the Halloween!
(You may also like:A�DIY Pumpkin Wreath Tutorial)
Have fun to do your project and happy Halloween day!


