What’s more exhilarating than having a unique decor to decorate the rooms in your house? It’s even much more fun when you can make it by yourself. It’s not only giving another beauty to the room’s layout but also will amaze all the coming guests.
You can also use some used stuff to create something by yourself regarding the home decor. There are thousands of interesting tutorials that are very tempting to try. Some are very easy to do, and other need a little bit of artist’s skill.
Right now, we share you something fun about recycling the glass bottles. You must have some used bottles scattered around in the basement, and it’s time to make something cute with them.
(You may also likeA�Ultimate Garden DIY Project: How To Make A Water Feature from Wine Bottles)
Sure, you may have found lots of DIY projects that benefit the used glass bottles from the wine bottles water fountain toA�backyard bottle torch, and here it’s time to make a self watering planter from the used glass bottles. It’s very easy to make and almost cost you zero bucks.
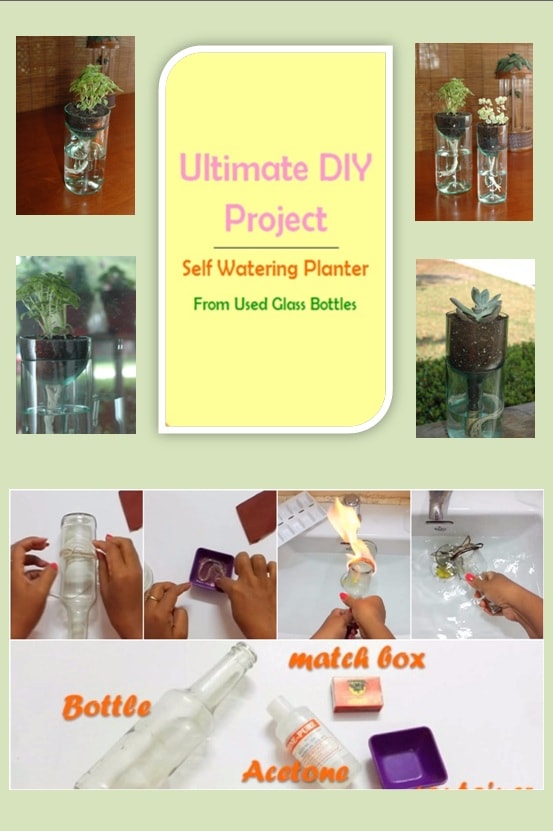
Basically, you’ll need to split a transparent glass bottle or the colored ones based on your preference, a cute greenery, and some water, then you’ll have this lovely unique planter ready. We’re going to split the bottle by using the yarn and fire, so we have to be really careful here.
(Check this out:A�Ultimate Summer DIY Projects: How To Build A Stock Tank Pool)
So now, let’s check what you will need to prepare and execute for this easy DIY project!
Self Watering Planter From Used Glass Bottles
The materials you’ll need:A�
- Transparent or colored glass bottles
- Yarn
- Mesh
- Ice
- Cotton twine
- Alcohol or nail polisher
The tools you’ll need:
- Scissor
- Lighter
- Sand paper
The steps you’ll need to do:
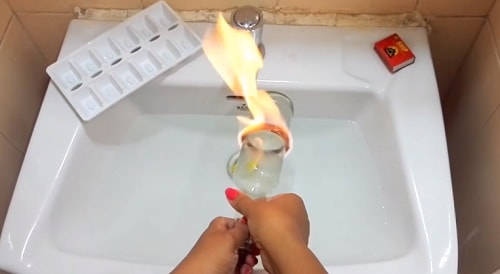
First thing first, it’s better for you to do the bottle splitting step in your sink area because it will be much safer to cool off the bottle after the burning process.
- Wipe the bottle by using a damp cloth and also the inside of the bottle to make it look crystal clear.
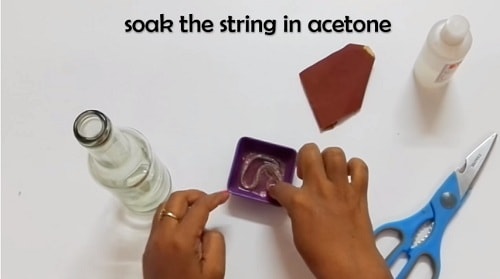
- Tie a tight knot using the yarn about 5 to 6 times below the neck of the bottle or the end of the curvy side of the bottle.
- You can either pour the yarn by the alcohol or remove the string first, soak it in the alcohol and put back to the bottle. Remember to wipe the remaining alcohol on the bottle surface.
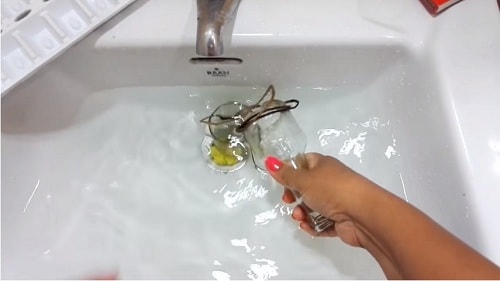
- Fill the sink with water and ice, make sure that the water is freezing enough.
- Now burn the yarn while rotating the bottle slowly. You have to do this step on the sink with the ice water and keep away any flammable substances around the sink area.
- Keep burning the string until it’s completely burnt. Add some other flame if the string hasn’t totally burnt with the remaining yarn.
- Now soak the bottle in the ice water immediately, then wait until the bottle split.
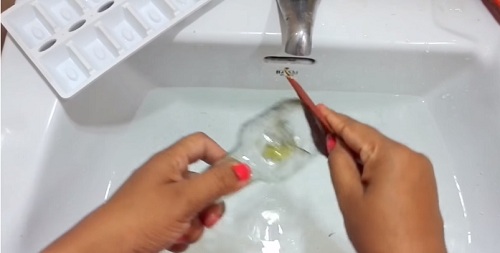
- Smoothen the edge by using the sand paper.
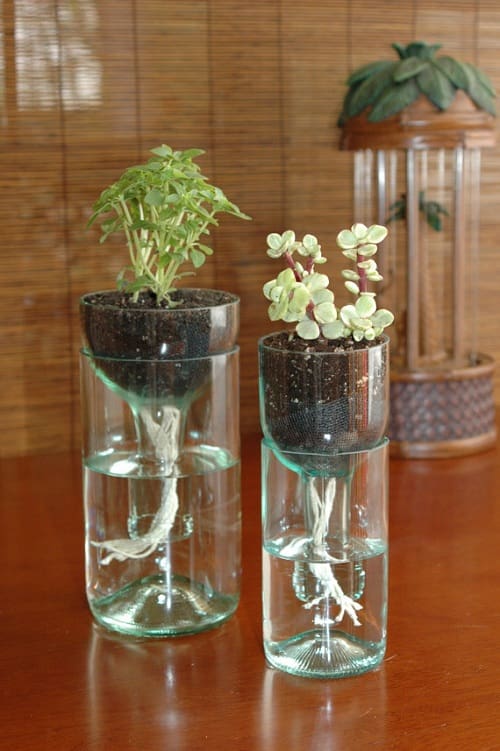
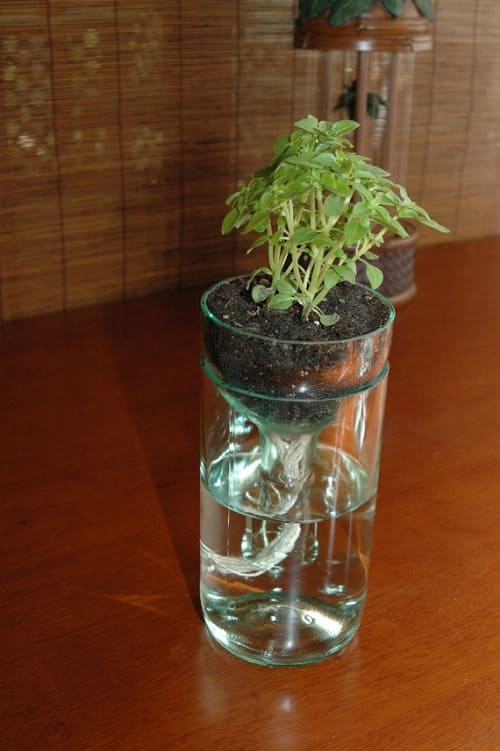
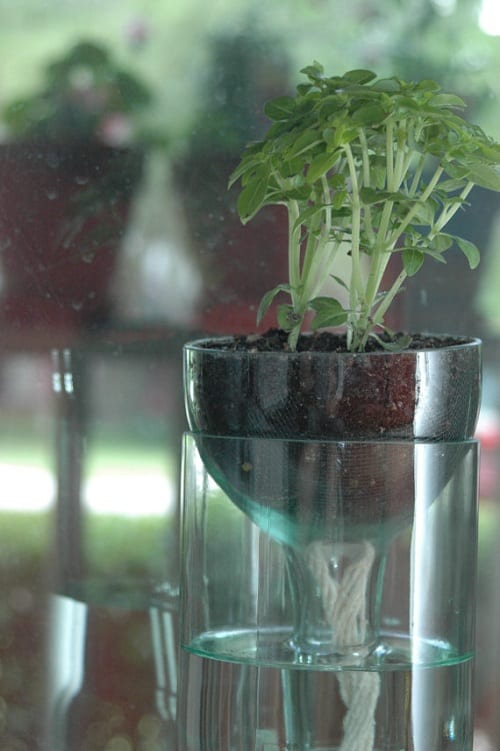
- Fill a half ofA�the lower part of the bottle with water.
- Put the upper part of the bottle upside down on the lower part of the bottle for the planter part.
- Add in the mesh to the bottom part of the planter.
- Hang the cotton twine, this is the means to transfer the water from the lower part of the bottle.
- Fill the space with soil and set your cute plan.

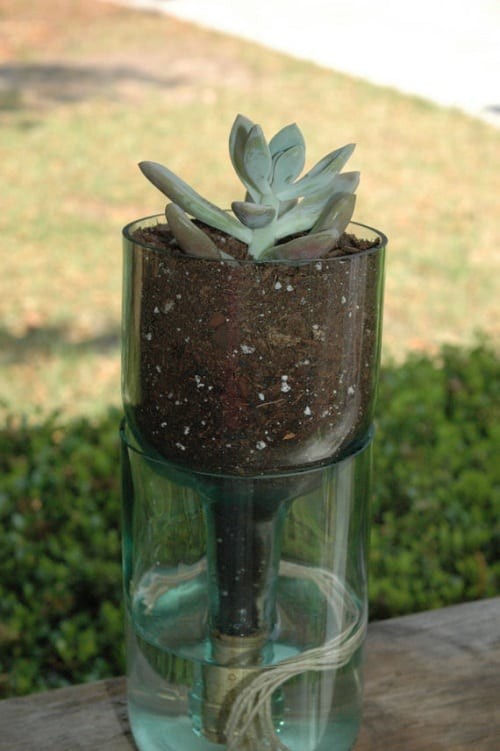
It’s not that hard, right? You can put this self watering planter on your work table, tv console, or dresser. It is so easy to mobe anywhere as you wish, and will freshen the room beautifully.
Have a nice try!


